RV Rebuild Retrospectives: Bedroom & Bathroom
If this is the first RV Rebuild Retrospective post you’re reading – check out the RV Rebuild Retrospectives: Kitchen post first to get background information about the series and why we rebuilt the Toaster the way we did.
RV Rebuild Retrospective Series:
There was a lot of damage to the original bedroom area. The whole front wall and roof was rotted because of water. So the walls in the front half of the bedroom came off. This gave us an opportunity to make some changes that we wouldn’t have otherwise done.
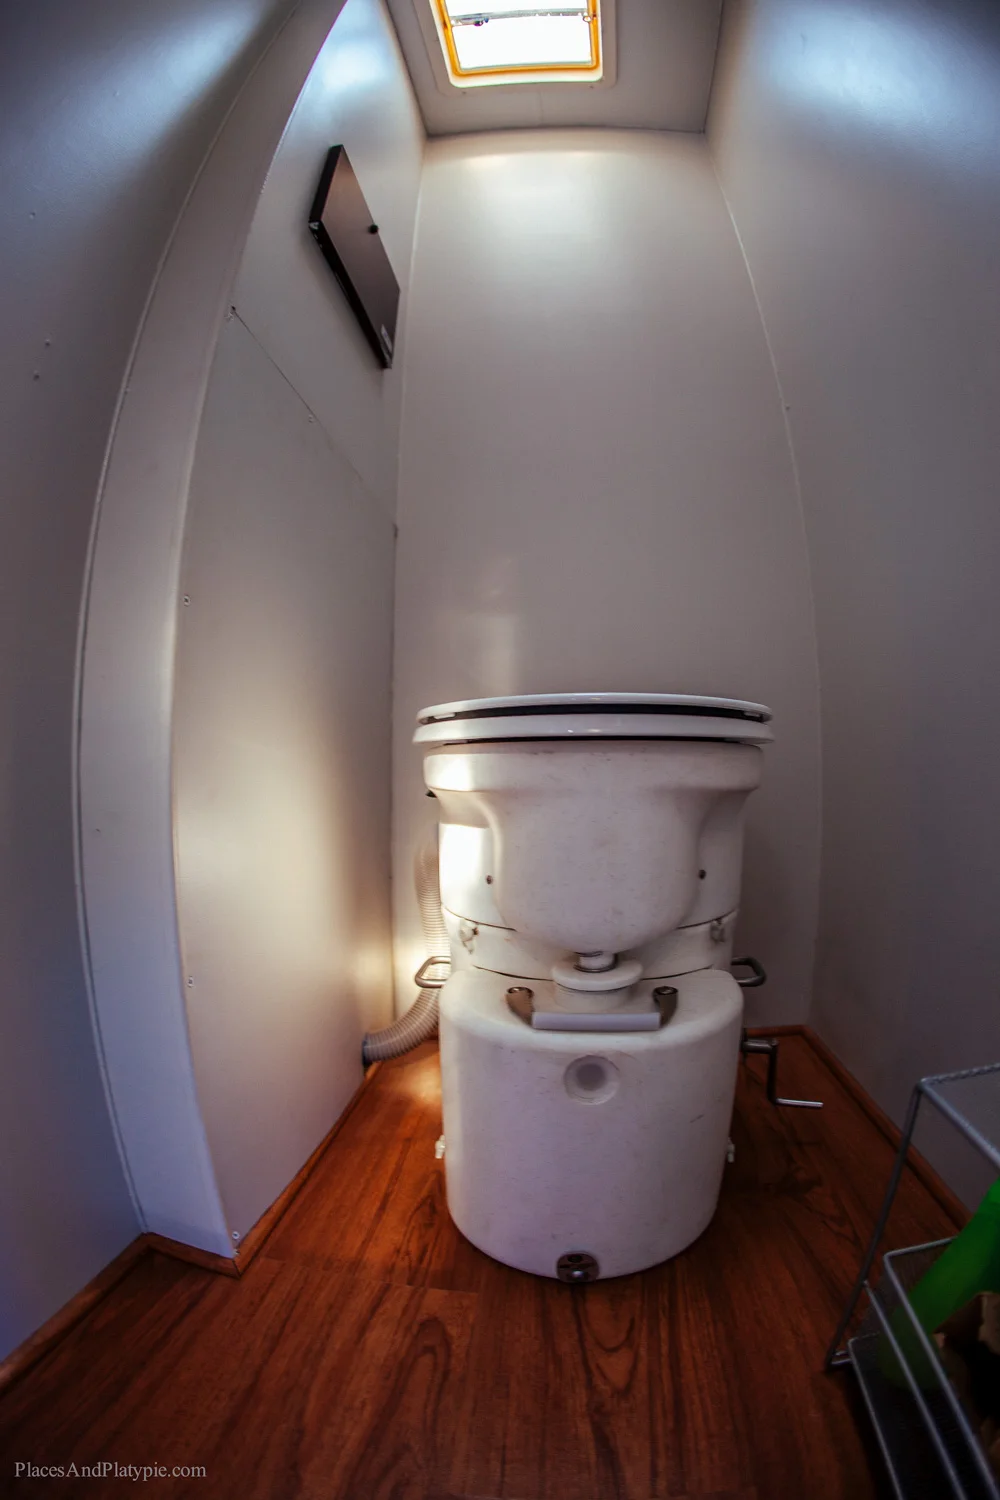
Our bathroom area is not all in one space but separated into three areas in the bedroom. The shower and bathroom sink are at the foot of the bed on opposite walls. Our Air Head compost toilet is in its own “room” next to the shower. While the work to the toilet room and shower weren’t as massive as the bedroom, the changes still had a big effect on our daily lives and comfort.
Bedroom
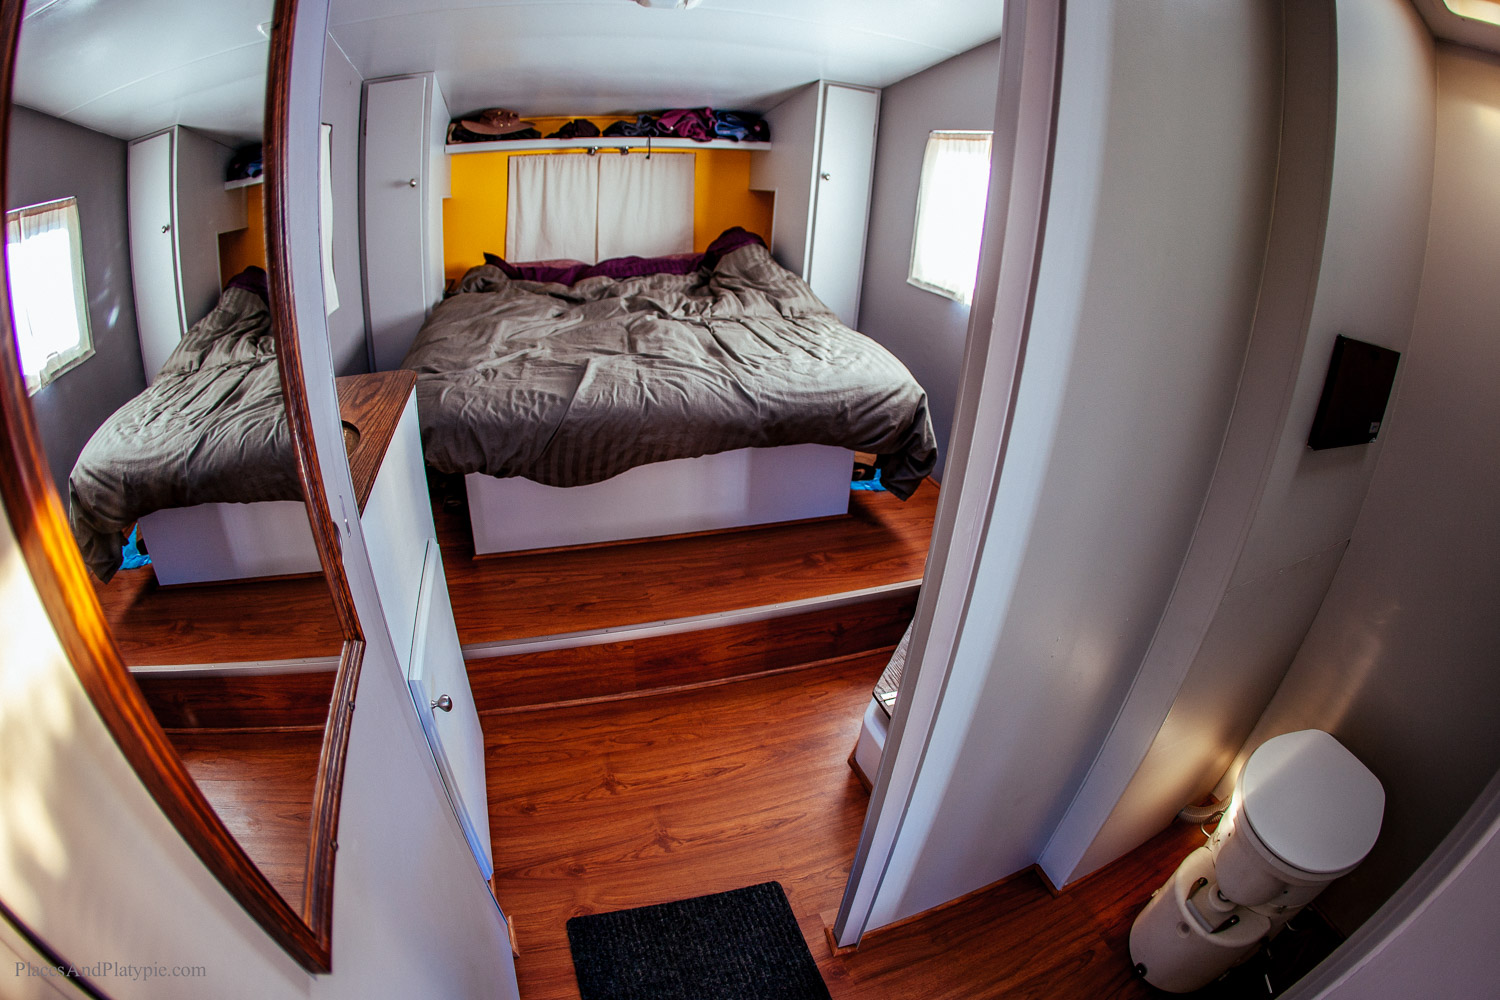
Photo by Places and Platypie.
PROS:
Since we had to rip out the front bedroom wall, we decided to extend the length of the bed (and thus the whole trailer) by 6 inches so that it was a true queen size bed. Jerud is thrilled that his feet no longer hang off the bed.

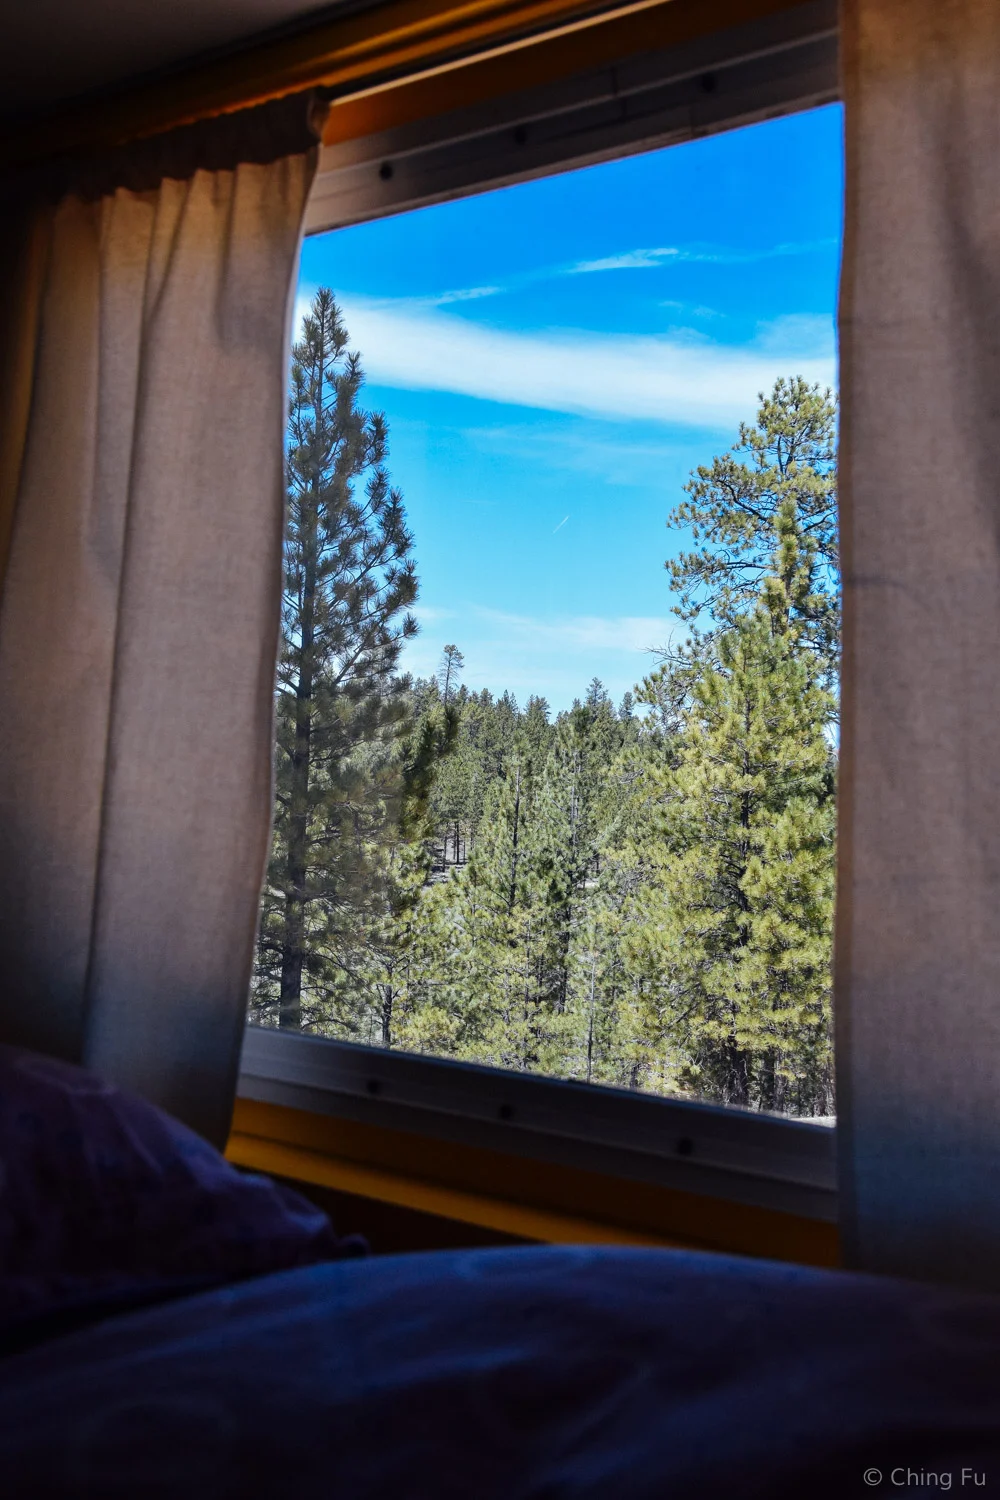
We also installed a window at the head of bed when we replaced that front bedroom wall. Every day we are thrilled about our decision to do so. We love being able to look out the window while in bed and it brightens the bedroom by a lot.
The original cabinets next to the bed were ripped out of the RV. They were ugly and small. In their place Jerud made new cabinets for our clothes and a cubby as our nightstand. The new cabinets are a better use of space and hold a lot more clothes. The cubby is actually useful as a nightstand and looks good. We also added 12V and USB receptacles to the nightstands. This lets us plug in our phones overnight to without causing the inverter to run.

The original bedroom walls were 1.5 inches thick (standard for RVs). The new walls are 3.5 inches thick (standard for houses). This means we added 2 extra inches of insulation in the walls, which help keep our bedroom warmer than the rest of the rig on cold days.
In addition to the extra insulation in the bedroom, we also installed a cellular window shade in the doorway that acts as additional insulation on top of being a “door”. It actually makes a difference and keeps the bedroom warmer than if it wasn’t there. Two people and two dogs generate a lot of body heat – no reason to let that heat go to waste!
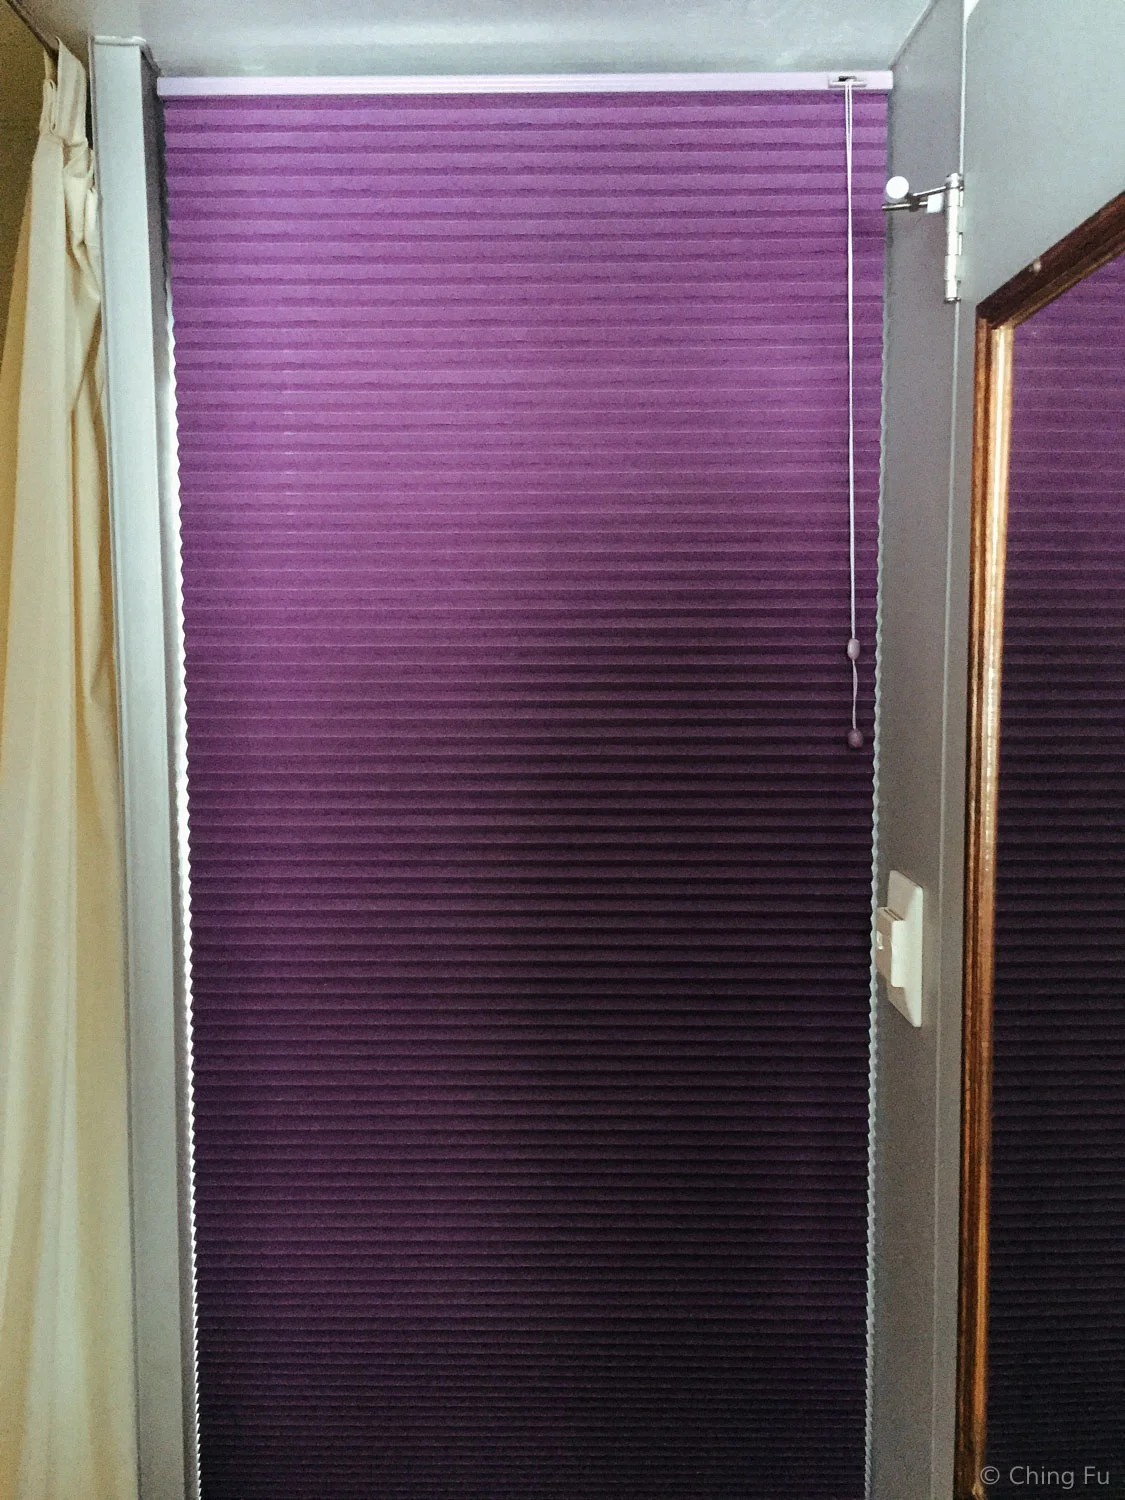
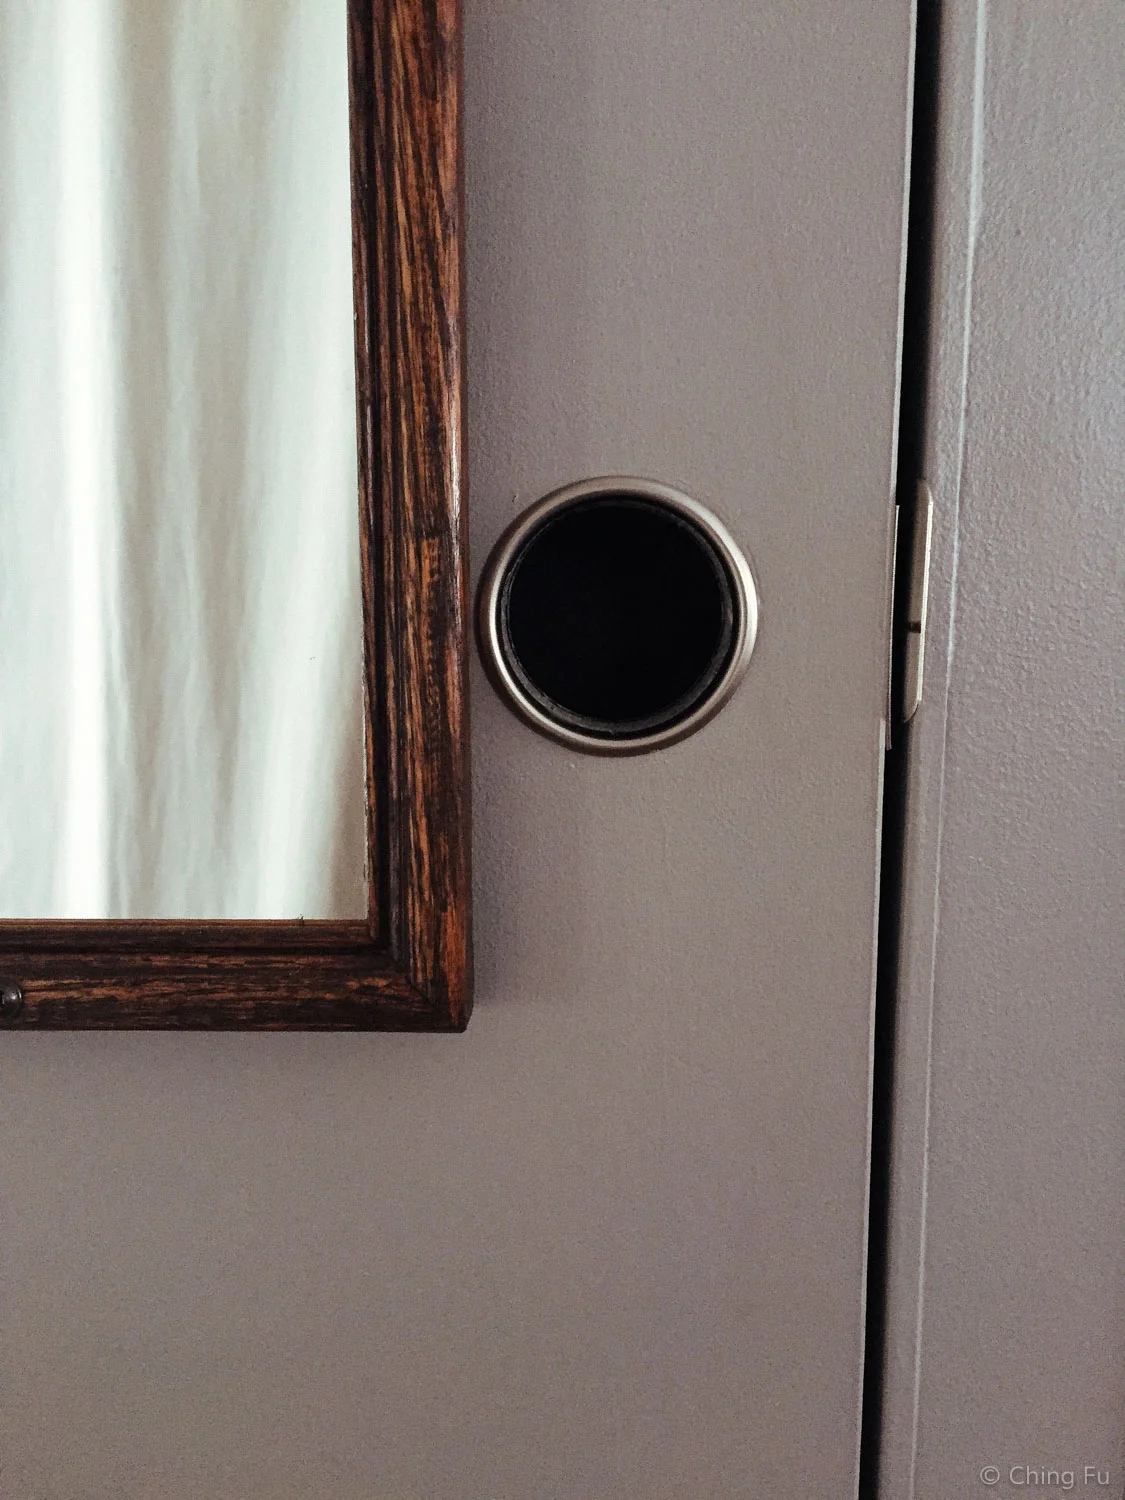
The hallway leading from the main space in the RV to the bedroom is narrow. So we removed the doorknob from the closet door and used the leftover hole as a finger hole to open the door. This works great and keeps the area streamlined.
This isn't something we rebuilt, but something worth pointing out: there is no insulation under our bedroom because it’s located in the gooseneck area of the Toaster (this is the case for most 5th wheels). But the entire space directly under the bed is storage and all the items stored under there act as insulation for the bed.
CONS:
We didn’t replace any of the original windows in the Toaster and the original windows are drafty. So having a window right at our heads in the bedroom gets a bit chilly. But it’s easily fixed with Reflectix placed in the window. New double-pane windows throughout the Toaster would have been nice.
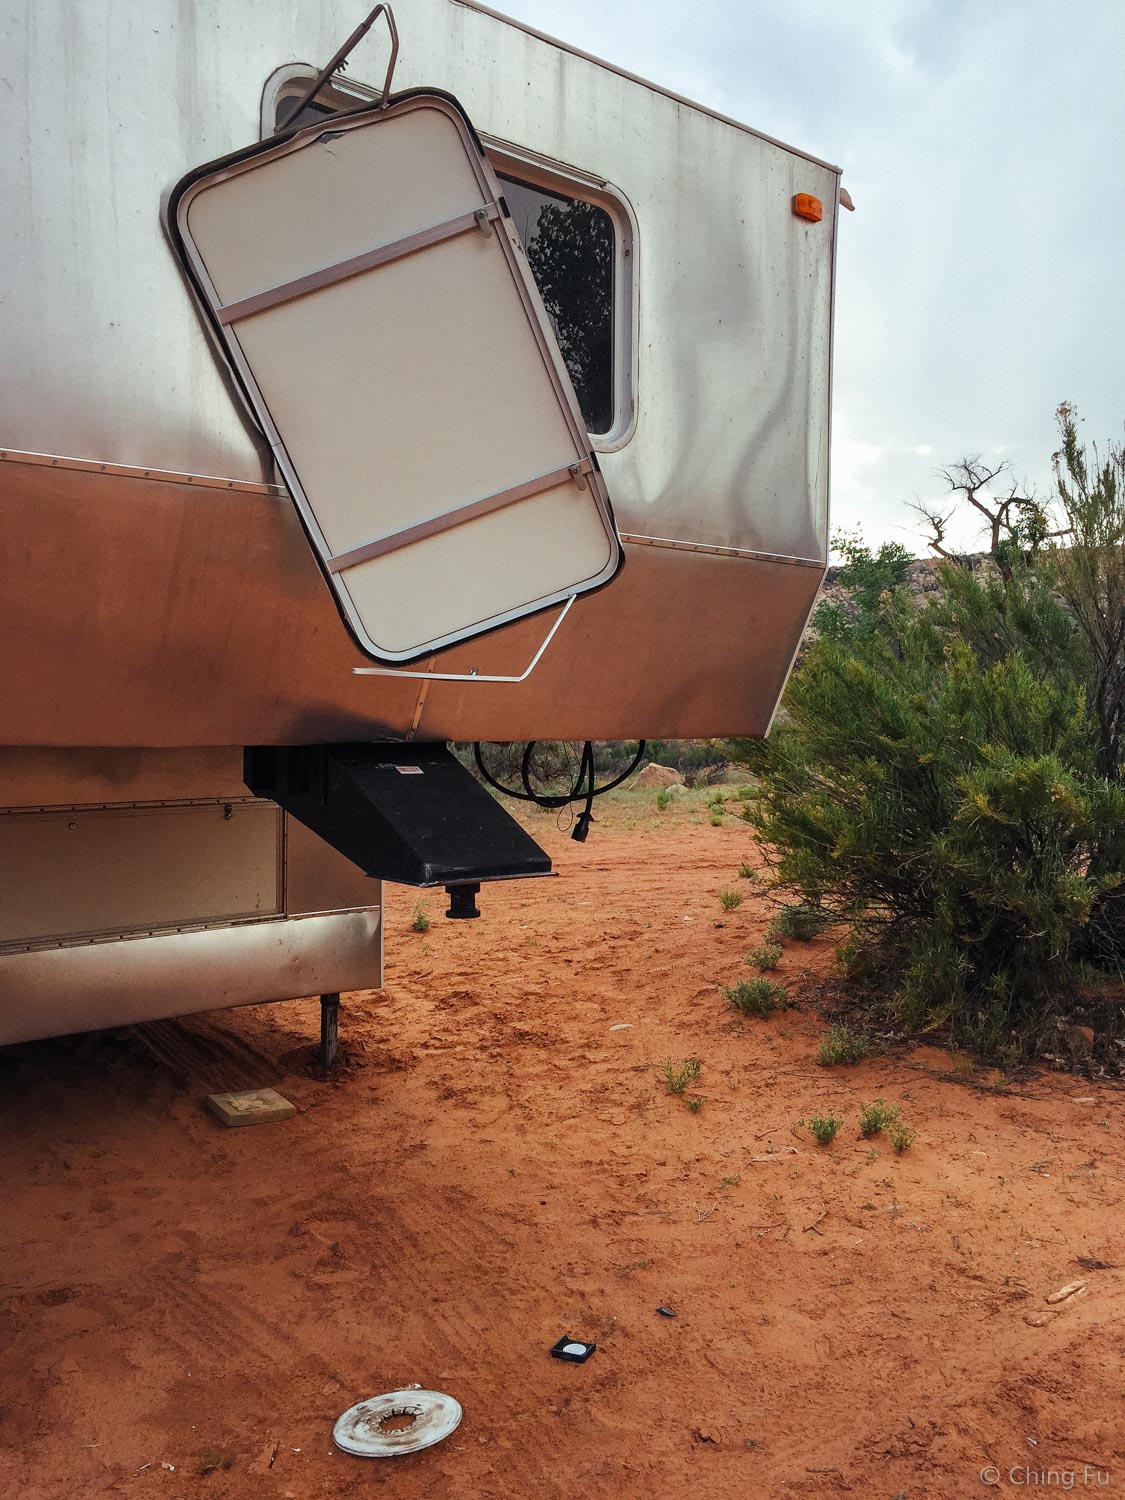
About two months in, the Toaster got hit by another RV while it was parked at a boondock site and we were away. The other RV ripped off our bedroom window cover. So now that window is always covered in bugs after we drive to our next location because we can't find a replacement window cover. It just means we have to clean the window after we park the Toaster.
Our new cabinets next to the bed fit a lot of clothes. Potentially too many clothes. The one thing we didn’t think about is how deep the cabinets are. We can put 3 stack-deep of clothes, but it means shoving our arm up to our shoulder in to reach the stuff in the back.
Since there isn’t any insulation under the bedroom except for directly under the bed, the floor around the bed gets really cold on chilly days. An RV skirt would help with that issue, but those are expensive.
Bathroom
PROS:
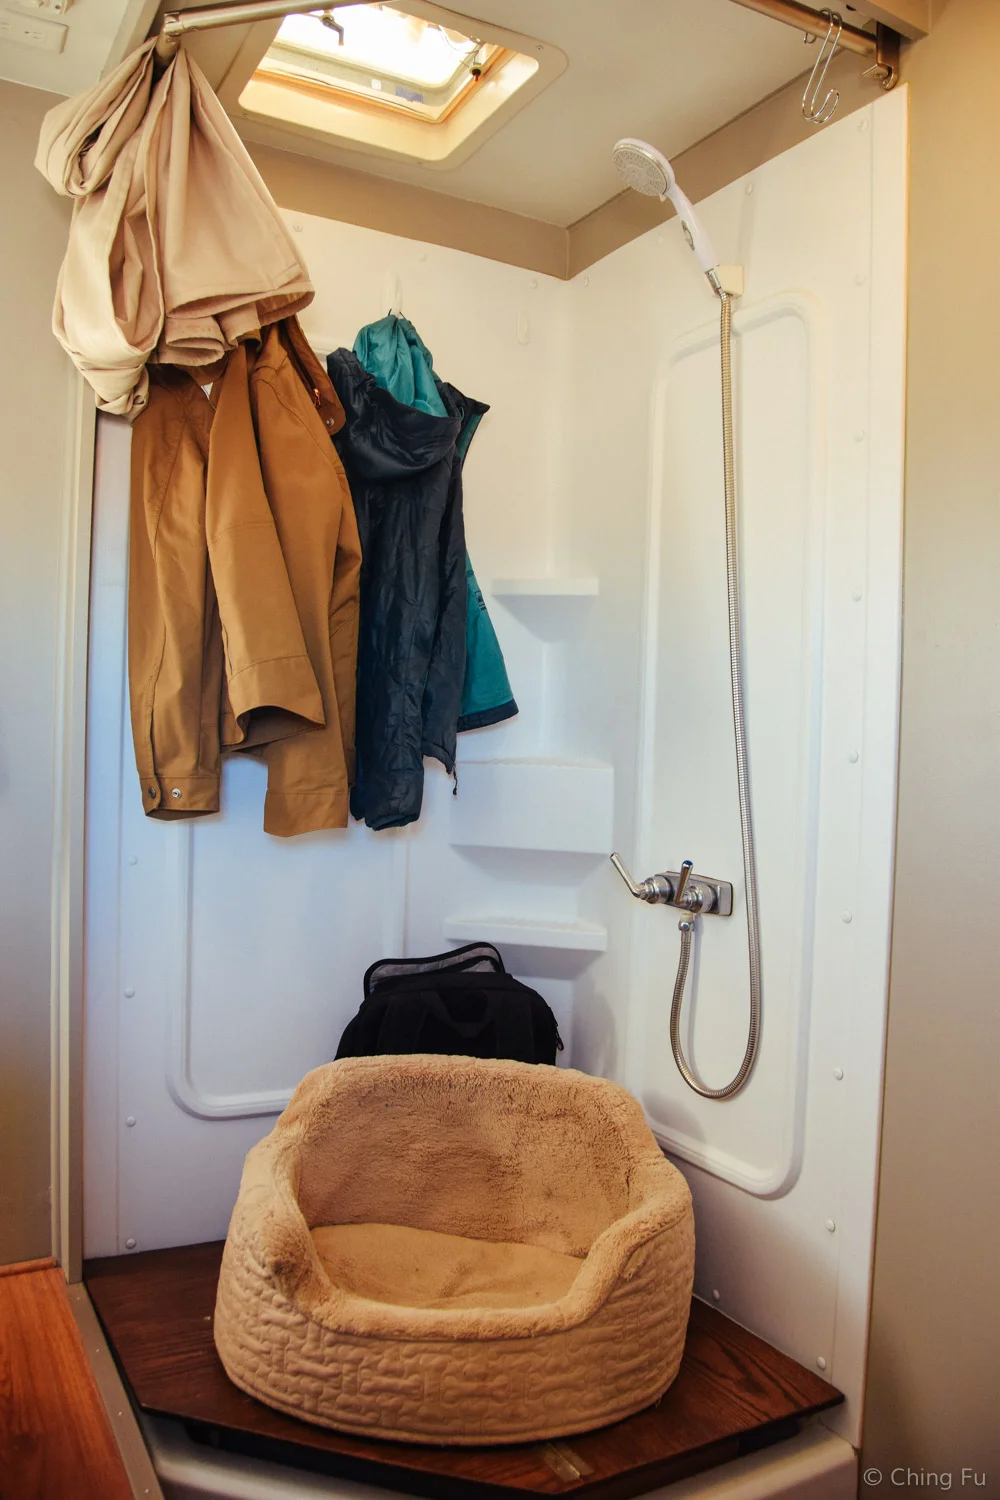
The shower that came with the RV was a square shower. It was so tight in there that we could barely put both arms up to soap up. So we cut out one of the walls and replaced it with a corner shower surround and pan. On top of that we installed an “extend a shower” rod, which added a couple more inches of space. This isn’t really what that shower rod is designed to do, but with a little trimming, it perfectly matches the shape of our shower pan.
We rebuilt our bathroom sink because the original one was ugly and didn’t have enough space inside to fit the water heater we wanted to put in for the shower and sink. There were three main changes were made to the bathroom sink. The first one was that I built the cabinet taller than the original one so that we wouldn’t have to bend over as much to use it (and to give enough space underneath for the water heater). The second change is that we installed the faucet and sink off-center so there would be more usable counter space. I love how the sink looks off-centered.

The third change we made to the bathroom sink is that we replaced the original over-mount sink with an under-mount one we made from a food mixing bowl. It provided us with a smaller circular sink and looks good.
We replaced the RV toilet with an Air Head composting toilet because of sustainability (uses no water), less weight (we removed the black water tank), longer boondocking stays (the need to dump is a limiting factor for most RVers and it allows us to use fresh water for other things), and less to mess with (don’t have to deal with black water).
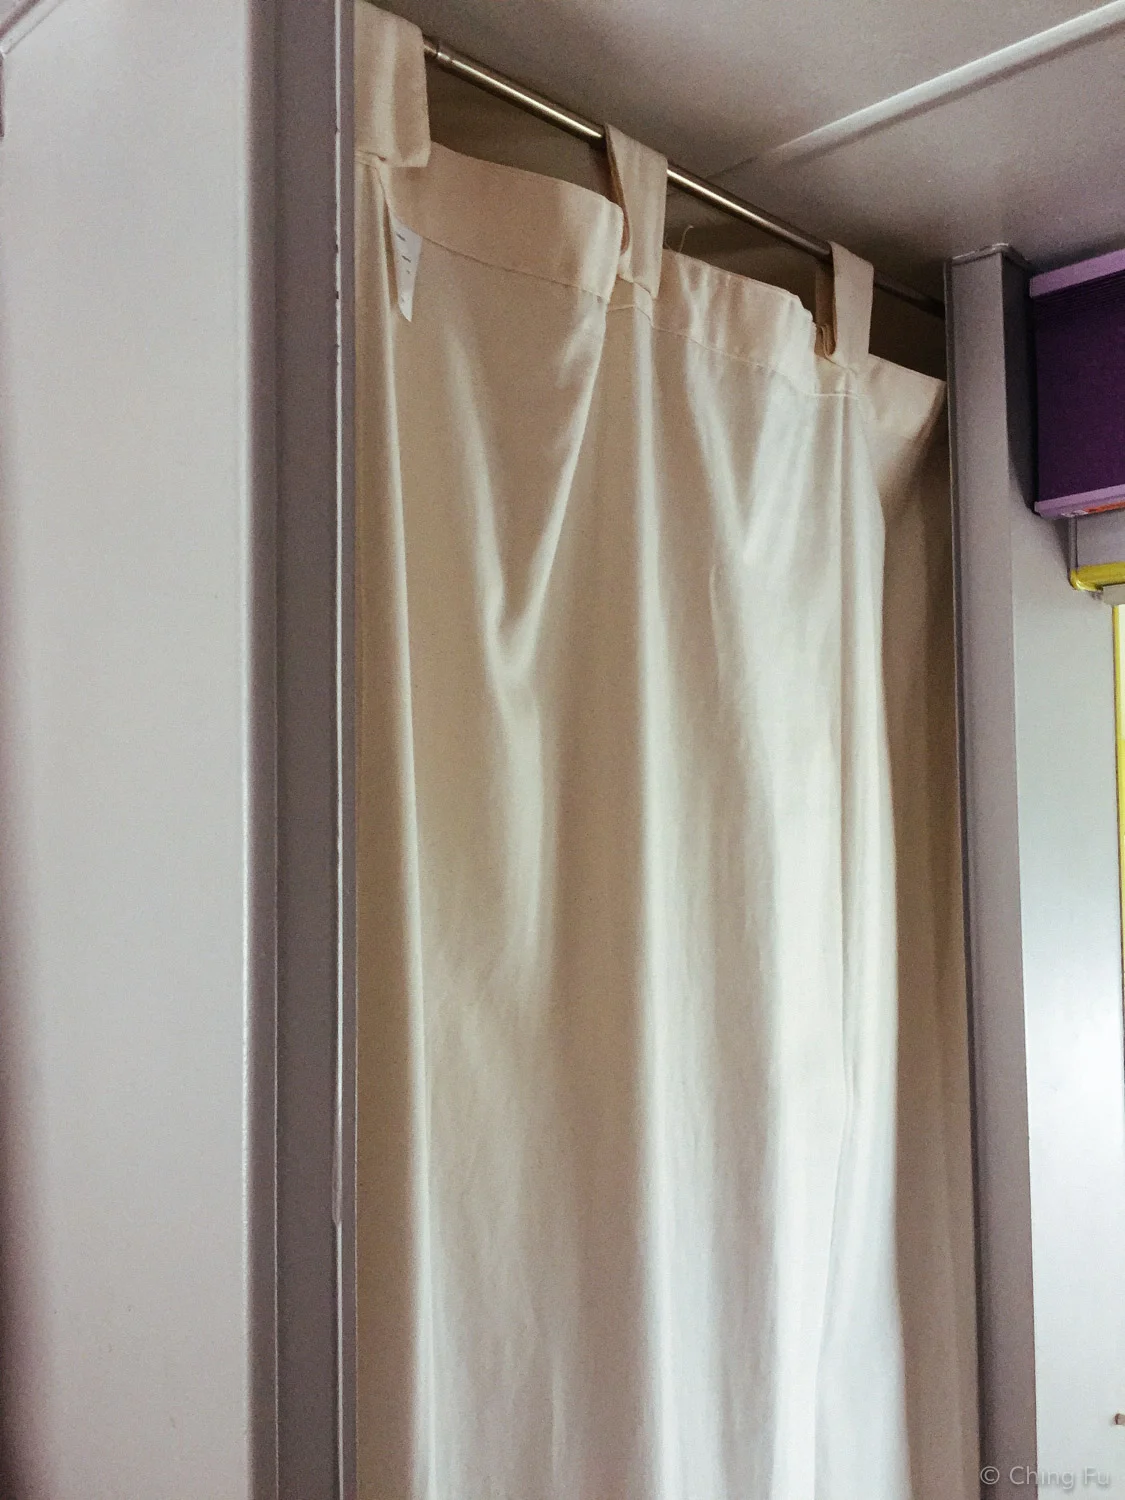
The bathroom door was removed. The hallway is so tight that we didn’t see the point of having two doors right across from one another (the other is the closet door). Removing the door took a few pounds of weight off the RV, which we were happy about. Also, the door really didn’t add any more privacy than a curtain, which is what we replaced it with.
We built a platform that sits on top of the shower so that when the shower isn't in use it's where Tyki's bed goes. Great use of space!
CONS:
I’m not the biggest fan of the white color and plastic material of our shower surround and pan. It shows dirt easily and just isn’t attractive. But the alternative solutions would have been a lot heavier and we were really concerned about the overall RV weight.
While I really like how the mixing bowl looks as our bathroom sink, we realized after using it that it's not the great as a sink because toothpaste leaves a residue on the stainless steel surface. This makes the sink always look dirty.
I find our bedroom to be really comfortable. I love propping a bunch of pillows against the cabinet and lay in bed to read, watch a movie, work on the computer, or stare out the window and daydream. I don't mind our bathroom layout where the shower, bathroom sink and toilet are all in different places. What I do find a hassle is that I have to move the shower platform and Tyki's bed whenever I want to shower. But I also think having his bed there is a really good use of space since we don't use the shower every day. Overall I'm happy with our bedroom and bathroom.