
What No One Tells You About Using Self-Leveling Epoxy
Disclosure: We purchased this item at retail and the opinions are our own. But this post contains Amazon affiliate links. As an Amazon Associate we earn a small commission at no additional cost to you. Please read our disclaimer.
Jerud and I decided to go with self-leveling epoxy to fix our countertops because it seemed like the easiest solution. Reading about the process and watching videos of other people applying it seemed to verify the ease of use. But it turned not to be true.
One of the problems with doing a project for the first time is that we don’t know all the questions to ask. So, it’s only when we started the self-leveling epoxy process that all these unanswered questions came up. Since the epoxy has a very tight working window, it made the experience very stressful.
We learned how to use self-leveling epoxy the hard way, but you don’t have to.
What Is Self-Leveling Epoxy?
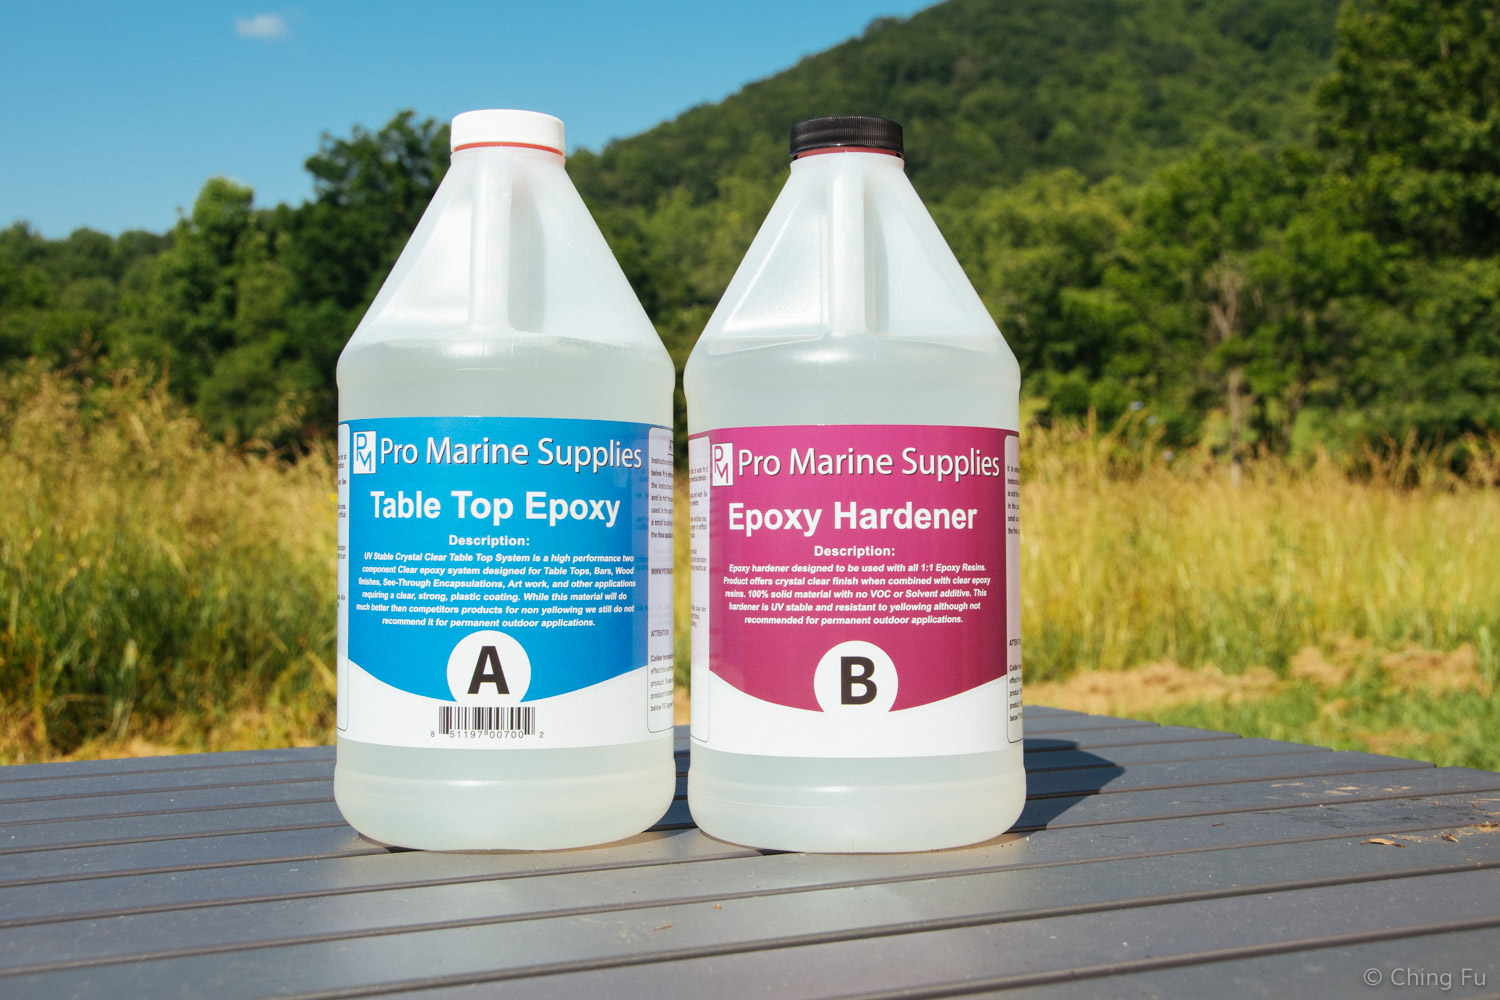
Self-leveling epoxy is the result of mixing resin and hardener that comes in separate bottles. After the two solutions are combined, the mixture is poured on a surface where it flows to level itself out to be an 1/8 inch thick. It then cures to become a hard clear surface that’s scratch and water resistant. Restaurants and bars tend to use it on their tabletops. If you want to make a countertop with pennies, bottle caps, and other stuff sealed inside, you’ll need to pour additional epoxy layer because each layer is 1/8 inch thick. The cured epoxy has a very shiny surface and because it’s clear, it resembles glass. We used Pro Marine Supplies Table Top Epoxy for our countertop project. Their product is UV resistant, which not all self-leveling epoxy brands are not.
What’s Neat About Self-Leveling Epoxy?
Self-leveling epoxy is supposed to be pretty a bomb-proof product which is what we need in a kitchen. We cook three meals a day in the Toaster and because it’s a small counter it’s constantly being used for food prep and everything else. Water is our biggest culprit for our countertop damage. This epoxy is supposed to be really water resistant so we (really me) don’t have to freak out about every droplet of water splashed on the countertop. Unfortunately, we didn’t even end up using it in the kitchen, read this post to find out why.
The cured epoxy does have an extremely glossy finish.

The self-leveling epoxy finish is actually so glossy that the sun reflected off the table and onto his face. Ok, so maybe that's not a neat thing about the epoxy...
Why Self-Leveling Epoxy Sucks
I won’t go into detail in this section about all the negatives of applying epoxy because most will be mentioned in the “don’ts”. The main disadvantage is how much waste is created when using self-leveling epoxy, especially if you apply it to multiple surfaces.
The containers that the resin and hardener are mixed into can’t be reused or even recycled because the leftover epoxy cures inside the container. (Turns out I’m wrong! In August 2020, Ryan S., a reader, left this comment below, “You can 100% use the container you mixed your epoxy in over again, I usually use a smaller bucket than the one pictured. After I pour my epoxy I leave my stir stick in the container. About 24-48 hours after allowing the epoxy to dry to a hardened state, I take my little plastic bucket, squeeze it on all sides, then I slowly pull my stick out, I end up with what reminds me of an epoxy popsicle. The resin will unstick from the plastic by you squeezing the container and since the epoxy is cured to the wooden stir stick, the stick acts as a handle to pull all the resin out.”)
Manufacturers highly recommended that a thin “seal coat” should be poured first if applying it on wooden surfaces and then the final layer called “flood coat”. After our experience, we agree and say it’s a requirement. But it does mean at least two mixing containers become trash when working on one surface. And because of epoxy’s extremely quick curing time, large amounts of epoxy can’t be mixed at a time. We learned this one the hard way.
Bristle or foam brushes are always necessary to help spread the epoxy over a table/countertop surface, especially around the edges. (We found foam brushes to work better.) There aren’t ways to clean the used brushes to be reused, so this goes directly into trash can.
Self-Leveling Epoxy Don’ts
Don’t mix a large batch of epoxy at a time.
The working timeframe for the epoxy before it cures and hardens is around 8 mins (lots of variables). If you have a large amount of mixed epoxy in your container, it’ll accelerate the chemical reaction because of the extra heat that the mix is generating and cure even faster. The downside is that none of the instructions we read gave us actual minutes or amounts to work within. Neither did any of the YouTube videos or blogs we came across. I had to talk to a rep over the phone to get this information. Unfortunately, it was after we messed up.
The first batch we mixed for the seal coat was a large amount of mixture. Enough for three RV-sized countertops. Not knowing what we were doing it took us longer to apply the seal coat on the first time. By the time we were done with one seal coat, the 2 quarts of mixed epoxy had already hardened in the bucket and was useless.
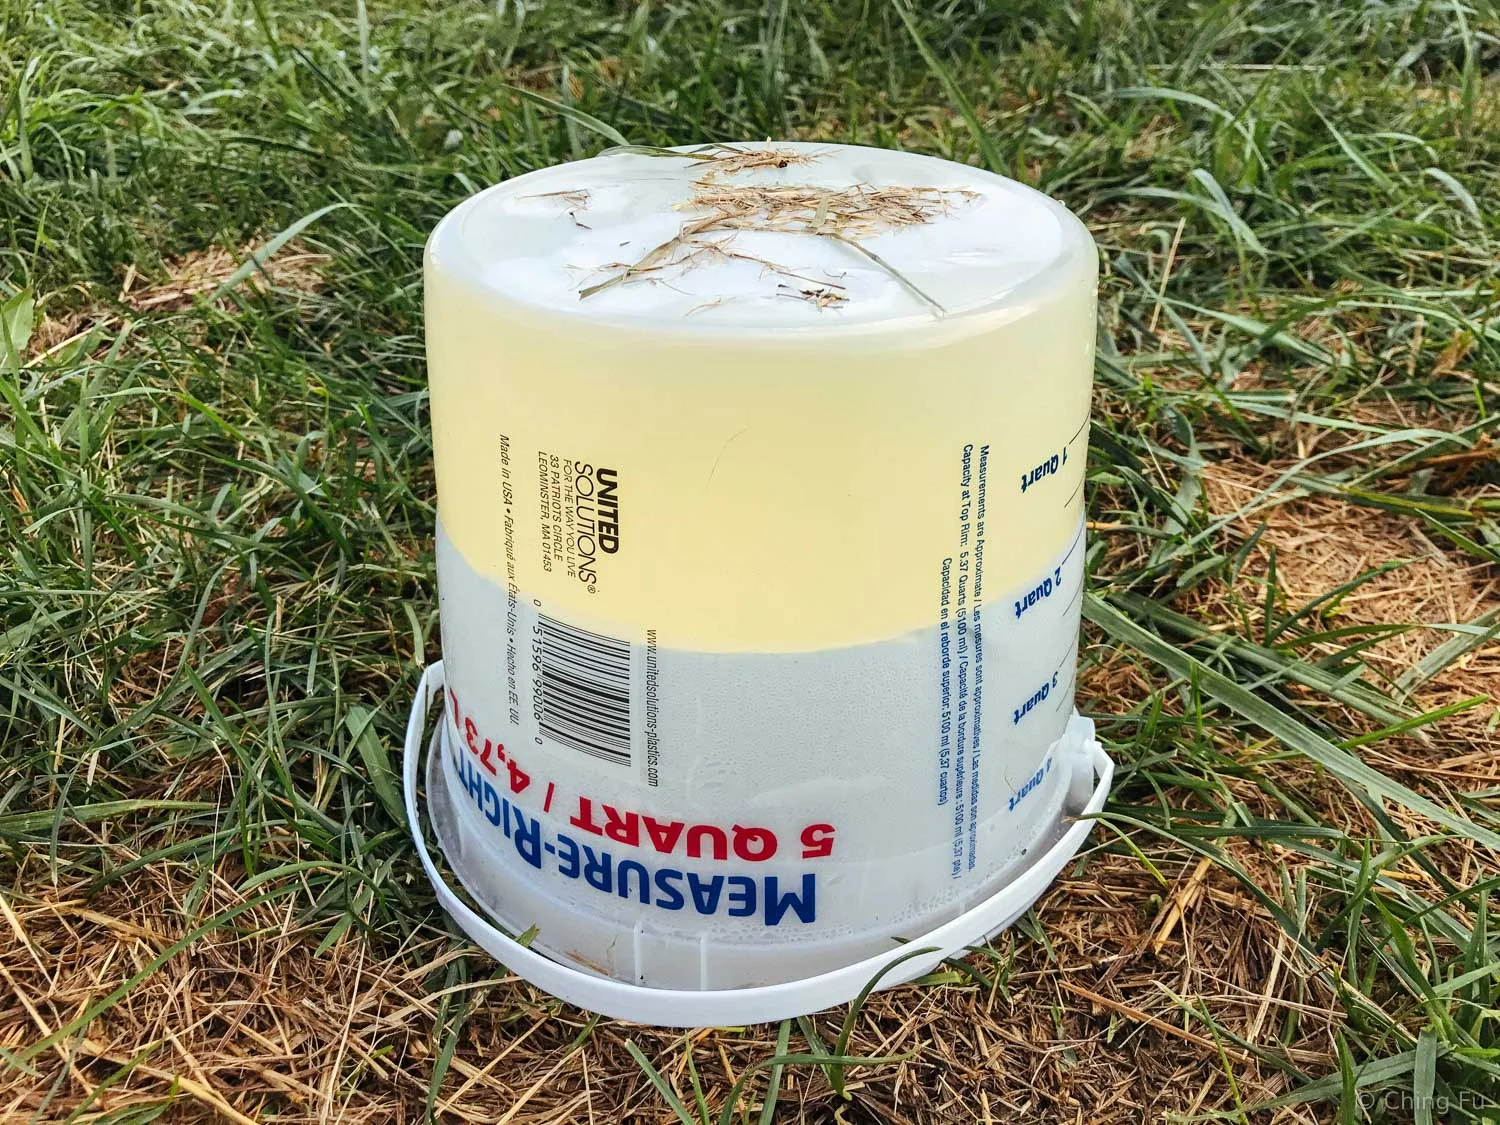
The epoxy cured sooner than we wanted.
We suggest starting with no more than 1 quart MIXED epoxy to have a reasonable amount of working time.
Don’t use epoxy in a small space, like inside an RV.
Self-leveling epoxy is extremely messy. This is kind of expected since the mixture is made to flow off the surface it’s being poured onto (that’s how it self-levels). Be prepared for epoxy to drip everywhere. It’s actually more than "some drips" but more like an overflow of epoxy coming off the edge of the countertop. It’s a good idea to make sure the edges of the plastic sheets used to protect the floor are curled upwards to prevent the epoxy from flowing off.
We had our three tabletop/countertop on a sawhorse in the middle of our main room. There was only enough space to walk around three sides of the entire setup, making it hard to reach all the areas of the countertops we applied this on. The situation got worse once the floor became a lake of epoxy from the flood coat.

This is the space we had to work in.
The other downside of using self-leveling epoxy inside an RV, especially in the southeast in June is the heat, humidity, and lack of ventilation. The ideal temperature conditions to use the epoxy in is 70°F – 85°F. Reaching this temperature isn’t a problem in June in Asheville, but we also had to keep all the windows and vents closed to keep the place dirt/dust free. We couldn’t stop sweating! We actually had to make sure our beads of sweat didn't roll off ourselves and onto the poured epoxy. It also meant there was no ventilation to help decrease the harsh smell of the mixture.
Instead, find a large, well-ventilated space to use self-leveling epoxy. We wish we had access to such a space.
Don’t breathe.
Pro Marine Supplies instructions says the epoxy is safe to use indoors because it’s non-toxic. It may be non-toxic, but the smell is harsh. Once we applied the epoxy to a surface, it felt like I had shards of glass cutting inside my throat every time I inhaled. I couldn’t stop coughing. You may want to consider wearing a mask if you’re sensitive to smells.
Don’t work barefoot.
I don’t know why we poured the flood coat not wearing shoes. Probably because we don’t ever wear shoes inside the rig. But the epoxy dripped all over the tops of our feet and then it was under our feet from walking over drips. We had to clean our feet off with rubbing alcohol!

Remember to wear crappy shoes because they will get covered in epoxy. Or make cardboard slippers
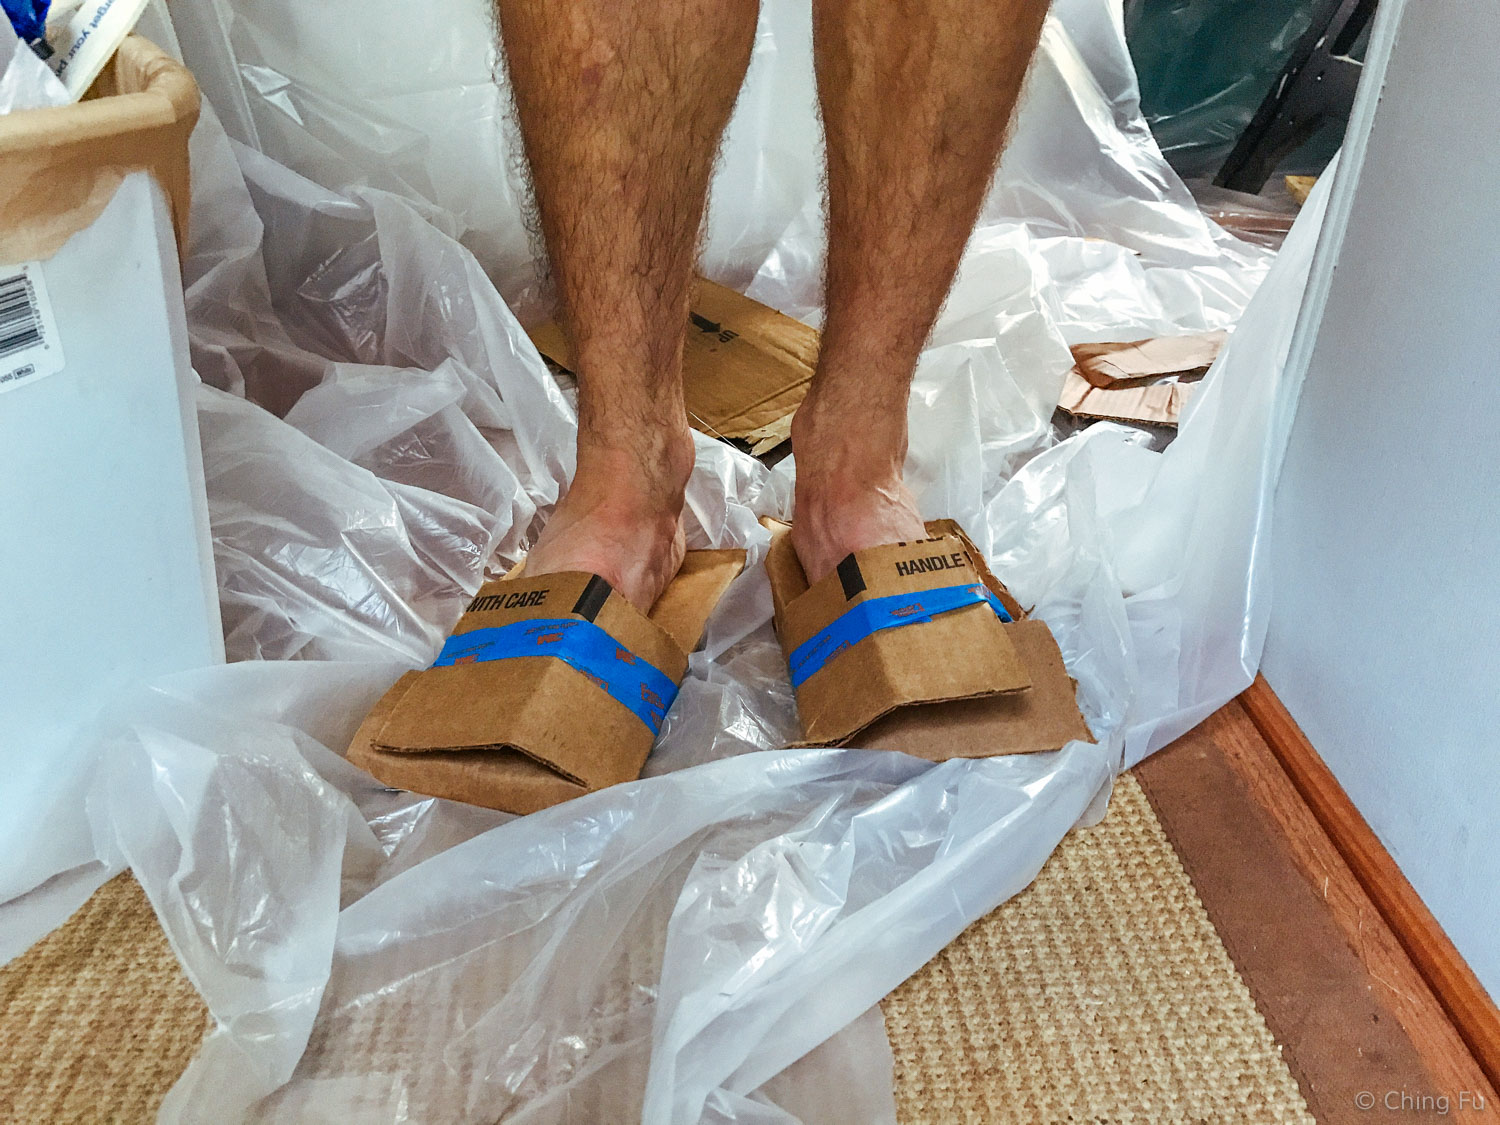
It totally works!
Don’t use cardboard to protect your floor or furniture.
The epoxy will soak right through paper. Instead, cover everything you want to be epoxy-free with plastic sheets. This is yet another source of waste in the process.
Don’t use self-leveling epoxy without trying it out on a test piece.
We could have saved ourselves a lot of headaches and mistakes if we had tested the epoxy out on a small piece of painted plywood first.
Don’t expect it to be fast and easy to use.
Epoxy is needy. There are many special requirements and conditions to be able to get the ideal epoxy result. The instructions say for best results, the epoxy should be applied in conditions between 70°F – 85°F (it can cure in temperatures higher, but we came across people saying it doesn’t work below 70°F). Mixing the resin and hardener has to be done just right to ensure it’s thoroughly mixed, but air bubbles haven’t been created as a result inside the container.

The resin and hardener has to be mixed together for at least 5 minutes.
The epoxy has to be poured on a level surface, which can be potentially difficult in an RV. There’s a 4-hour wait between coats, then it has to cure for three days (minimum) before using the surface. A heat gun (or propane torch) has to be used to get rid of any air bubbles that appear after pouring a flood coat (there will definitely be air bubbles). And then it needs to be checked again several times to make sure additional air bubbles don’t appear. If a cured epoxy surface reaches 120°F, it’ll soften and create an indentation if something is on the surface. Although I was told by Pro Marine Supplies' rep that it will relevel itself.
Don’t expect your epoxied surface to turn out flawless, especially your first time.
We noticed after pouring a seal coat that random areas of the paint on our dinette table was being “eaten” away from the epoxy and leaving behind pinholes that showed the underneath wood surface. When I asked about it, the Pro Marine Supplies’ tech support rep said it’s because paint and wood are porous materials. But she didn’t give me a solution.
If you have dogs, you’re guaranteed to have at least one strand of dog hair epoxied into your surface. Ours has a Tybee fur in it, so that’s ok.
Our surface also has bubbles in it and came out kind of wavy in areas, however this might be due to us being stingy with the flood coat pour. This is noticeable in the right light or if we look closely. From afar it looks pretty nice.
The edges of the table/countertops came out the worst. The self-leveling action creates drips at the edges, which is normal and expected. We used foam brushes to smooth out and evenly cover the edges with epoxy, but we didn’t do good enough of a job. Perhaps our work space was too small to let us access all the sides of the tables well. Perhaps we didn’t go back frequently enough while the epoxy was dripping and drying to smooth out the surfaces. Instructions say the remaining droplets can be trimmed while drying and then sanded smooth after curing. While we did our best to remove the droplets under the table, we still have dried up droplets of epoxy stuck there, which you can feel when you run your fingers under our table. The sanding didn’t work out great, it created a scuffed-up look that was worse than leaving them alone. The assumption seems to be that the product will be used on surfaces which are basically only viewed from above (unless you’re 5). The underside of the table edges can be made smooth – but not “pretty”, which is an issue in an RV because there is seating across our dinette and you can see the underside.

See the circular dents in the clouds and trees above them? Those are flaws in our dinette table that we epoxied.
Don't use a brush to apply the epoxy.
We tried using a foam brush to spread the epoxy for the seal and flood coat, but didn't like how it worked. Instead, we found a 4-inch plastic putty knife to work very well. The epoxy can also be cleaned off it with rubbing alcohol as long as it's done before the epoxy dries on it. The epoxy tech support rep had recommended using a V-notch trowel that's typically used for cement projects. But I couldn't find a plastic one at Lowes. Plastic is preferable over metal so it doesn't scratch the surface you're working on.
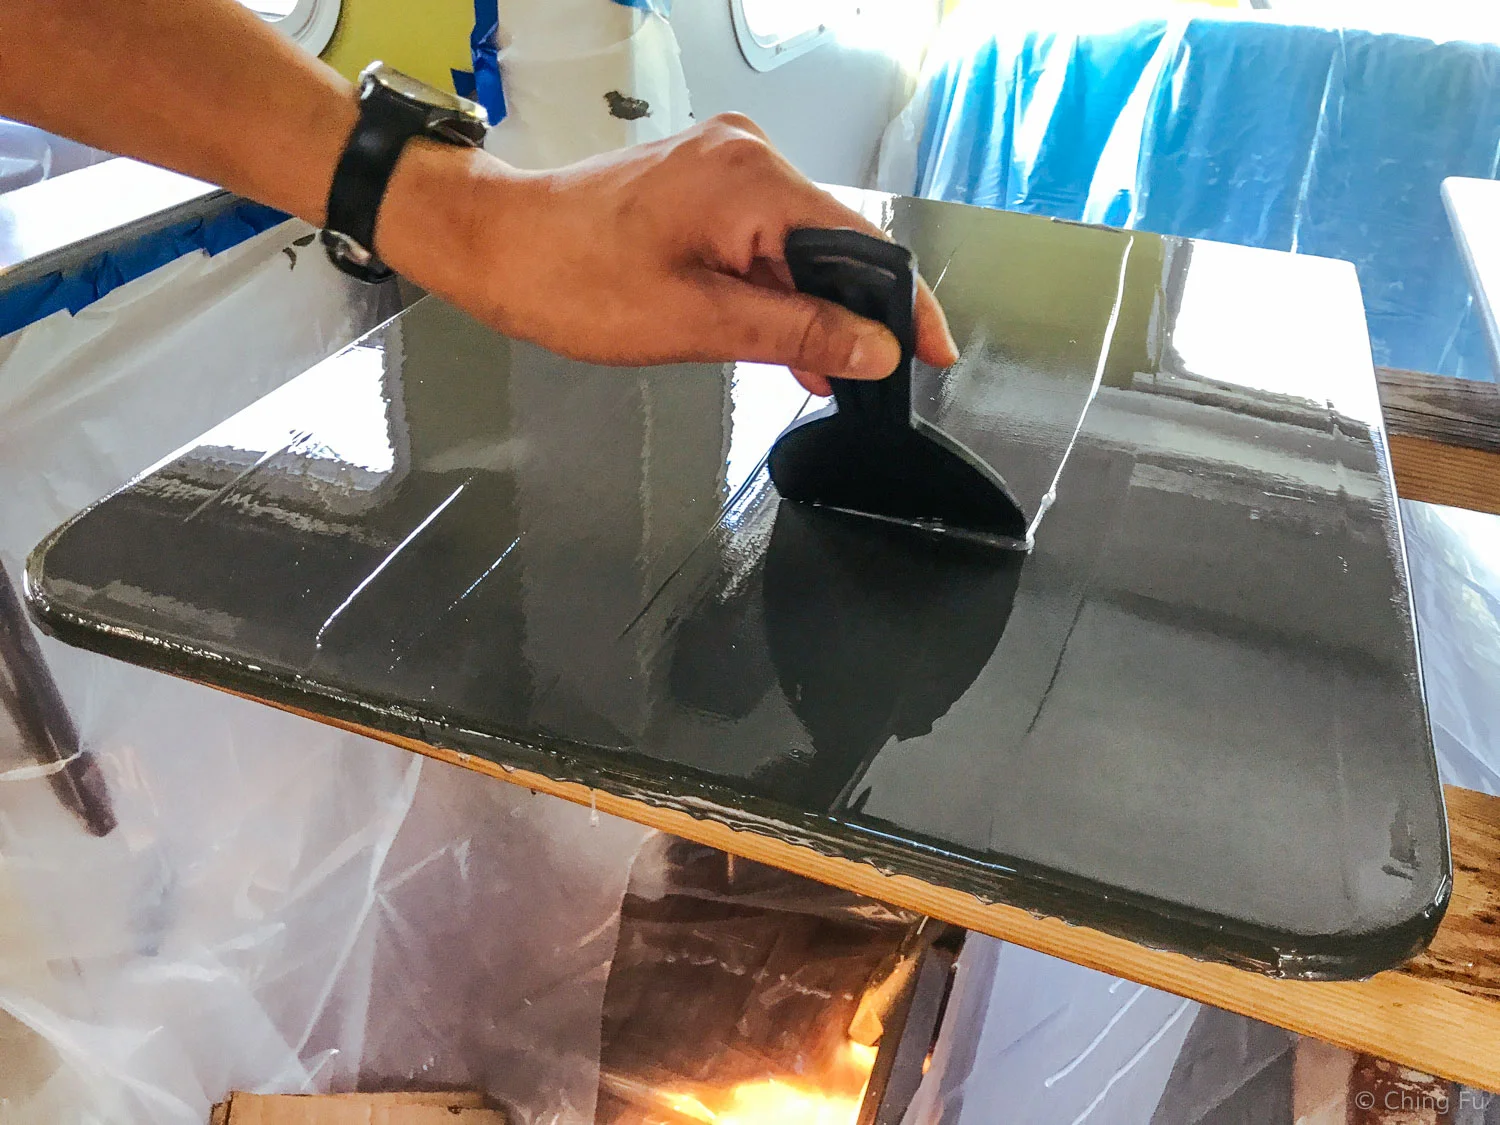
But we did use a foam brush on the table/countertop edges to help spread the epoxy and remove any drippings from underneath the edges.
Don’t use self-leveling epoxy if you’re anal, don’t like to clean frequently, or have kids.
The glossy surface means dirt, dust, fingerprints, and streaks are all extremely visible. I didn’t realize that our original stained wood finish masked a lot of dirt so I didn’t have to clean our countertops all the time.
Don’t use the epoxy on a kitchen or bathroom countertop with an installed sink.
Ok, not necessarily “don’t”. But be aware that applying self-leveling epoxy on a countertop with an already-installed sink gets complicated. The self-leveling epoxy is made to spread and flow over edges. This means it will drip over and into a sink unless a dam is created to stop the flow. But then you need a way to remove the dam, so it has to be made so it doesn’t get buried in epoxy. This is one of the main reasons why we ended up not using it on our kitchen and bathroom countertops. We didn’t fully understand this dilemma until it was too late (as in we based our entire countertop remodel on using self-leveling epoxy).

Protecting our kitchen sink while we work on the countertop. We didn't epoxy this countertop because the sink was already installed and we can't remove it without damaging the countertop.
The epoxy companies recommend creating a dam using wood covered in 2 mil plastic. The epoxy dries on the plastic but doesn’t adhere to it (or wax paper I later found out from tech support).

The epoxy that dried on our plastic sheet easily came off in pieces like this one.
Our main problem was that we have an under-mounted sink that we can’t easily remove and we wanted the inside lip of the counter to be covered in epoxy but not the sink itself.
Don’t worry too much.
We freaked out after pouring the seal coat because it was drying extremely unevenly. But it turned out, and epoxy tech support rep verified that, it's OK if the seal coat does that. The smoothness of our flood coat wasn't affected by it. But tech support did say that there are times when two seal coats are required - especially if it's really porous or knotty wood. The uneven drying of the seal coat means that certain areas of the surface is sucking up more epoxy than other areas.

The tech support rep also told me that one of the cool things about epoxy is that it can be worked on again and again. She said that if are a lot of defects on a cured epoxy surface, it can be sanded down and more self-leveling epoxy can be reapplied. That can be in a few months or years, which is great, but if there is a problem with the surface beneath the original epoxy coating (such as our paint which "eaten" away), that is there forever.
So technically we can work on ours again. But that’s not happening because it was such a hassle the first time around. Besides, we live in an RV that’s not even remotely fancy. And I’ve learned to let go of the idea of "perfection" with the Toaster.
I’m going to wait a month or two to see how our epoxied dinette table and pantry countertop holds up before writing a post about their durability in an RV.

What the pantry countertop looks like after the epoxy has cured. Very reflective!
If you have more experience with using self-leveling epoxy and want to share tips – whether they are do’s or don’ts, we’d love to hear them!

