Electrical System Design – Part 2: Loads
Disclosure: This post contains affiliate links. Please read our full disclaimer.
In Electrical System Design - Part 1, I broke the electrical systems of our trailer (the Toaster) into the “solar” side and the “load” side, and discussed the solar equipment we are using. If everything is going well on the “solar” side, we don’t directly interact with any of that equipment day-to-day. There have been some hiccups and experiments, but mostly the inverter, batteries, and charge controller hum away unobserved. We watch our state-of-charge on the Magnum remote, which helps us make electricity-usage decisions. But typically we can use power almost like we did in a stationary home.
Now it’s time to talk about the “load” side. In the diagram above, it’s just four blocks…the technical details for this equipment are a lot more straightforward than the solar side, but how we actually use the devices powered by the batteries has an impact on how the system is designed.
You should read the we’re-not-experts-and-this-will-bore-you-disclaimer from my previous post, because it applies here, too...
AC / DC
For info on AC vs DC power, you can check out these links:
The shorter, but more boring link
…or do some of your own searching online. Just so we’re on the same page for this post: Power coming from our solar panels and being stored in the batteries is all DC, at 12V, which is common for RV systems (lights, fans) and many portable appliances (anything that plugs into a car “cigarette lighter” / accessory port). USB devices also use DC power (at 5V). No conversion is required from the 12V batteries to power a 12V device, so the biggest efficiency losses in a DC system are due to transmission losses through the wires. Transmission losses increase with the amount of electrical current that is flowing, and more current is needed for higher-power devices. So DC is great for low-power applications (like lights and fans), but high-power applications (heaters and things with big motors) demand high currents, and the wires need to get larger both for safety, and to prevent excess losses. Large wires are heavy, expensive, and hard to route.
Household AC power is what most of us are used to using, and of course, the vast majority of consumer appliances and electronics are built to run on 120V AC power. AC appliances draw less current than if they were powered by DC, so the wires can be much smaller and can cover longer distances without substantial losses. The downside is that getting AC power from a (DC) battery bank requires an inverter, and the inversion process is not 100% efficient.
So with both AC and DC, there are downsides – the idea is to use each one for what it’s best at, ending up with the lowest total losses overall.
A rough schematic of how the power runs in the Toaster
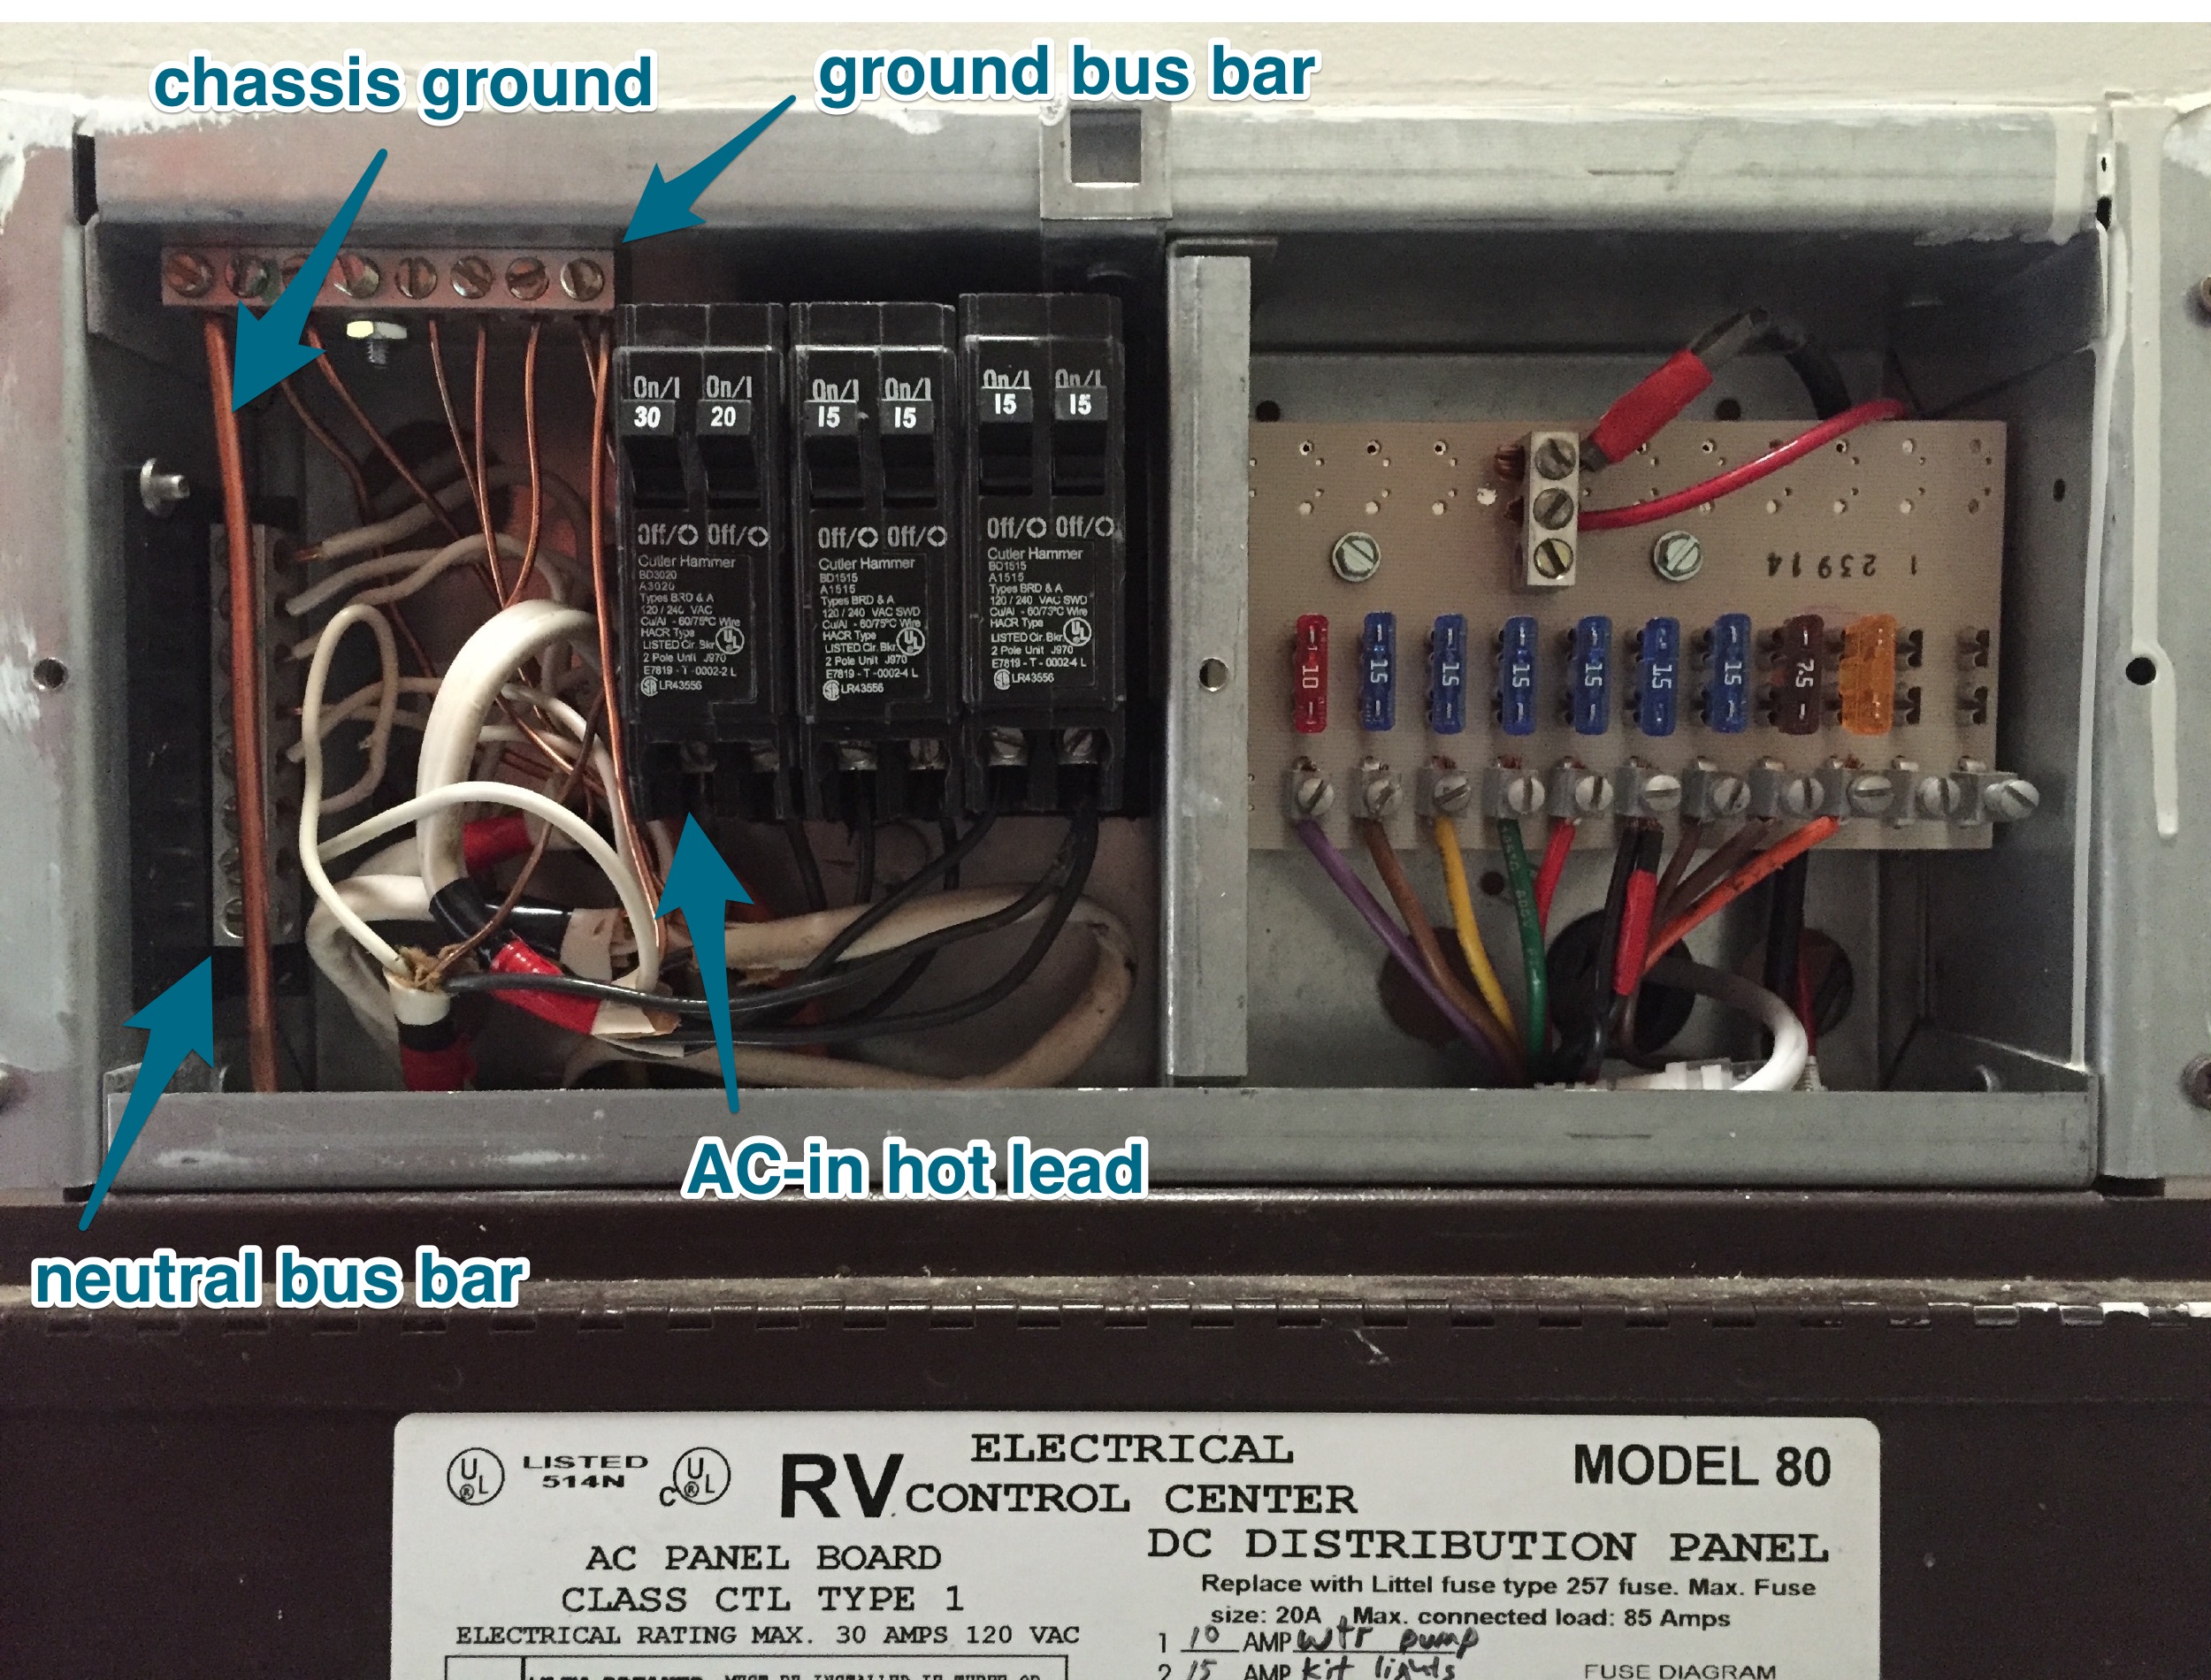
The Distribution Panel
Every electrical device on the Toaster is powered through the distribution panel. This looks, and works, similar to the circuit breaker boxes found in normal houses, except that residential breaker boxes generally only handle AC power, while an RV breaker box also handles DC power. The distribution panel takes in DC power from the batteries and AC power from the inverter, and breaks each of them out into branch circuits. Similar devices are typically grouped onto a single circuit, such as lighting, receptacles, or fans. Each circuit is protected by a resettable breaker on the AC side, or an automotive-type fuse on the DC side. Circuit protection is too much to get into here, but it’s insanely important, because inadequate circuit protection creates a fire risk. If you’re designing your own system, do your research.


More Inverter Info
Everything connected to the AC side of the distribution panel is powered by our inverter. So I have to talk a little more about how that works, before discussing the individual circuits. Using plug-in appliances requires more care than in a grid-powered home: In a house, you can (almost always) plug in and turn on whatever you like, anytime you like. Furthermore, you need not worry about whether installed appliances like the fridge, stove, or water heater happen to be running at the same time. But an inverter-powered system is limited by how many Watts the inverter can produce at once, and the inverter powers everything, including the installed appliances (fridge, water heater) – which cycle on and off on their own. If anything in the “house” tries to use more power than the inverter can supply, the inverter will turn itself off before it overloads. And that’s good – nobody wants an electrical fire – but it can be a nuisance.
The highest-wattage devices we have are the 1500W water heaters, so we could – barely – have gotten away with a 1500W inverter. But that would mean that if a water heater was on, we couldn’t use any other AC devices at all, not a phone charger, not even a nightlight. Since both the water heaters and the fridge cycle themselves on and off automatically (according to their internal thermostats), we’d have to actively manage both of those appliances with on/off switches, which would be annoying and require our constant presence in the trailer. Can you imagine if you had to remember to turn your fridge on and off several times a day? How long would it be before you came home to a warm, moldy fridge?
A 2000W inverter would let us leave the water heater and fridge on all the time – just like in a stationary home. They could each cycle on and off according to their own internal controls, and the inverter would have at least 400W available capacity for additional loads at all times. We could run a small kitchen appliance or laptop chargers, without trouble. If we wanted to run something bigger, such as the electric cooktop or space heater, we’d have to manually turn off the water heater to ensure it wouldn’t try to come on at the same time and trip the inverter. This could be made easy by wiring a switch to the water heater. It would be some inconvenience but not that big of a deal.
SIDEBAR:
Electric Heating
When you are using electricity for heating -- whether it's water or air, you come across the figure of 1500W very often. This is because 1500W @ 120V requires 12.5A current, which is a nice, safe number to run over #14 Romex. Manufacturers of plug-in appliances (like space heaters and electric teakettles) don’t want to be liable for a fire because someone plugged their appliance in on a standard-duty 15A household circuit.
We opted for an even larger, 2800W inverter (Magnum MS2812), which cost us about $300 more than we’d have paid for their 2000W model. We oversized the inverter because we were unsure what to expect from our all-electric RV experiment, and wanted some spare capacity “just in case”. One advantage of this “excess” is convenience: With so many Watts available, we can have the fridge on, cooking breakfast, making toast, charging laptops, and blending a smoothie all at once.

Click to open a "cleaned up" version which only shows the MS 2812.
That convenience is nice, but oversizing our inverter could have been a major mistake. In a (rare) bit of luck, the MS2812 turned out to actually be our best choice (a happy accident) after all. I didn’t even realize this until after I had written most of this post! I was, in fact, planning to write about how our inverter was oversized and how we were incurring excessive efficiency losses. But after spending some time with the inverter efficiency curves, it became clear that we’re doing better than I had assumed. Take a look at these curves (copied from the Magnum Inverter product manual). The chart shows curves for several products, so it looks a bit complex, but we only need to look at the one curve, for the MS2812.
For reference, here’s some of our common usage patterns.
Except for the large, 4000W (24V) model, these inverters hit peak efficiency at relatively low wattage. Most of the time, when our inverter is running, it’s for only the fridge which draws 100W on average. This is actually “off the left” of the chart, but you can mentally extend the lines and see that our inverter (MS2812) is probably still operating in the high-80s of efficiency at this wattage, verses the more reasonably-sized MS2000, which looks like it’d barely be working at 80%. At the 1500W mark – the other common operating point for us due to either water heaters, electric teakettle, or space heater – MS2812 efficiency is down to 85% but still beating out the MS2000 models.
Having said all that, now we can talk about the AC circuits:
AC circuits
| Circuit | Name | Breaker Rating | Conductor | Devices |
|---|---|---|---|---|
| 1 | Supply | 30A | #10 Romex | Feed from inverter |
| 2 | Bedroom Receptacles | 20A | #12 Romex | Receptacle, vanity Receptacle, driver-side nightstand Receptacle, pass-side nightstand Receptacle, bedroom ceiling |
| 3 | Kitchen Receptacles | 15A | #14 Romex | Receptacle, exterior Receptacle, pantry Receptacle, by stove Receptacle, kitchen sink Receptacle, under cupboard |
| 4 | Refrigerator | 15A | #14 Romex | Receptacle, dinette* Receptacle, Refrigerator |
| 5 | Water Heaters | 15A | #14 Romex | Bathroom water heater* Kitchen water heater* |
| 6 | Floor Heaters | 15A | #14 Romex | Main room floor heater Bedroom floor heater |
* indicates departures from best-practices
Circuit 1: Inverter Feed
AC power coming from the inverter feeds into the panel at this breaker. That power either comes from our batteries, or – when we are plugged in – the inverter will pass shore power straight through to the panel (while also using some to charge the batteries). This wire and breaker is sized to handle “typical” RV park 30A current. The breaker is actually redundant for us, because the inverter has its own 30A breaker and we also have a Progressive Industries inline surge suppressor and voltage monitor hardwired into the shore-power line. The surge suppressor actually reacts faster to faults than the 30A breaker in our panel (we learned that the hard way, but it’s not much of a story). It might have been nice to turn this breaker into a 6th branch, but the terminals inside the panel weren’t set up to wire that way so it was easiest to leave it in place.
Circuit 2: Bedroom Receptacles
Space heater in its usual home on the bathroom counter
AC receptacles in the front half of the trailer are on this circuit. We built our bedroom with extra insulation and partitions to isolate it from the back of the trailer, so that in very hot or very cold weather, we only need to heat or cool that space – about half as much airspace as is in the rear. So this circuit is sized for the higher currents demanded by an electric space heater, or plug-in window Air Conditioner (if we get one).
Circuit 3: Kitchen Receptacles
We never actually use the one under the cabinets...
It’s nice to have plenty of receptacles. We were happy with the number and location in the original trailer, so we stuck with the existing ones, although a few locations were tweaked. Since counter space is at a premium, our appliances are not often left out. When you want to use one, there’s often just one tiny scrap of countertop you can fit it onto, and you want a receptacle right there. So, surprisingly, lots of outlets is a pretty good thing even in a small space!
Circuit 4: Refrigerator
Regular apartment-style fridge
During the trailer rebuild, we removed almost every original wire in the trailer, but there were two runs of the original AC wiring sandwiched in what was left of the floor. We could:
- Tear up the good floor and make more repair work for ourselves
- Cut them off and leave them as dead weight, then try to pull new wires through the same space
- Make them work as they were
We decided to work with what was there, which meant the circuit that powered the fridge would have to power one receptacle near the dinette. Normally, fridges should be on their own circuit. So…we have a rule about not plugging high-wattage devices into that receptacle. The laptop chargers are the only thing we’ve ever used there, anyway. A residential fridge also usually gets a 20A breaker, but our apartment-size unit only requires 15A (per the manual).
About the AC fridge: A 100W device that runs all day, every day (intermittently) should be a good candidate for DC power, not AC. But for us, that didn’t make sense. The two reasons are cost and wiring: DC refrigerators are super efficient, but due to much lower production volumes, cost quite a lot. We’re talking thousands. Also, they draw pretty high currents. So to run a DC fridge, we’d have to pull thick wires to power it, and unfortunately the fridge is just about as far from the batteries as possible, so the already-thick wires would have to be up-sized further to compensate for voltage drop. This would mean a lot of expensive, heavy cable (and pulling that though the original floor would have been a lot of extra work). In the end, it made more sense to design for AC and accept the inverter losses. In contrast, modern “energy star” apartment-size refrigerators are very affordable, and tolerably efficient. Ours spikes up to 300W briefly when the compressor kicks in, but drops down to 120W in less than a second, and after a few minutes of running has settled in at 90W.
Circuit 5: Water Heaters
The kitchen water heater. The trash can typically lives in front of it.
Our two mini-tank water heaters are each rated at 1500W, making them a tie for “biggest” appliance on-board (second “biggest” is the plug-in electric space heater). So…why the hell are they on the same circuit!?
Our RV’s distribution panel originally powered a trailer that relied upon propane to operate every major appliance, so it didn’t need a lot of AC circuits. Switching to an all-electric design meant more devices needed to be powered by AC. But even our oversized inverter couldn’t run both water heaters at the same time (that’d be 3000W), regardless of whether they are on different circuits. So we manage them manually, turning each one on and off in anticipation of needing a shower or doing dishes. Since we only run one at a time anyway, we are getting away with having them on the same circuit, but yes, it’s possible we could turn them both on at the same time and exceed the current rating of the wire. Having done this accidentally, I know that the inverter trips off very quickly, but still – if I could wire them separately, I would have.
We’re still not comfortable enough with judging our energy usage to confidently keep both tanks hot at the same time. Managing them manually helps keep us engaged and attentive to their use. Using electricity for space heating and heating water for residential use is a HUGE load, far bigger than cooking or anything else we do – bringing the bathroom water heater up to max heater temperature uses half of our available battery capacity, so that’s a pretty big deal! This is one of the biggest challenges of our Fossil-Fuel-Free experiment, and we expect to make some improvements in this area.
Circuit 6: Floor Heaters
At 75W in the bedroom and 150W in the main room, they’re not very demanding devices.
DC circuits
| Circuit | Name | Breaker Rating | Conductor | Devices |
|---|---|---|---|---|
| 1 | Pump | 10A | #14 | Water Pump |
| 2 | Kitchen Lights | 15A | #14 | Slide light Under-cabinet light |
| 3 | Bedroom Lights | 15A | #14 | Reading lights Bed lights Vanity lights Shower lights Hallway lights Bathroom lights |
| 4 | Main Lights | 15A | #14 | Dinette lights Main lights Entry lights Porch lights |
| 5 | Ventilation | 15A | #14 | Fantastic Fan bedroom Fantastic Fan main room |
| 6 | Receptacles | 15A | #14 | Nightstand cig. lighter / USB receptacles (2x) Pantry cig. lighter / USB receptacles Stereo power |
| 7 | Controls | 7.5A | #14 | Slide rocker switch (power to rly) Water pump switch (power to rly) |
| 8 | Exhaust Fans | 7.5A | #14 | Shower exhaust fan Range fume hood fan Refrigerator cooling fan (future) |
| 9 | Toilet | 5A | #14 | Toilet fan |
| 10 | Unused | - | - | - |
| 11 | Unused | - | - | - |
The DC side of our system is a lot more straightforward than the AC. I kind of love that about DC. These devices are low-current and low-wattage, so they can get used on-demand without much thought. I often refer to LED lighting as ”free”. The DC side of the distribution panel is powered from the batteries through a Low Voltage Disconnect (LVD) relay. This will shut off power to the panel once our batteries drop below 50% SOC (to protect the batteries from damage).
Circuits 1 & 7: Water pump
This is the only DC device we manage manually. If we left the pump on, it would cycle on and off all day in order to maintain system pressure. Because we have a large accumulator tank, we can casually use water without turning the pump on except for cooking and showering. Even with the accumulator, system pressure bleeds down periodically and the pump runs intermittently. To save electricity and pump wear, we leave it off most of the time. A better pump might not lose pressure as much and we could leave it on all the time – RV pumps have a reputation for failure, so I’m sure we’ll have to replace this one soon and we’ll find out then.
The original trailer wiring ran the pump’s power leads from the front of the trailer to the rear, through the switch, then back up front to the pump, all on 14awg wire. This means the pump was powered through a total of at least 30 feet of 14 AWG wire, suffering a voltage drop of about 1V. That’s not giving that poor water pump much to run on. I powered the pump from a relay instead, allowing a much shorter wire run. The small trigger wires for the relay cover the distance to the remote on/off switch.
Circuit 2 – 4: Lighting
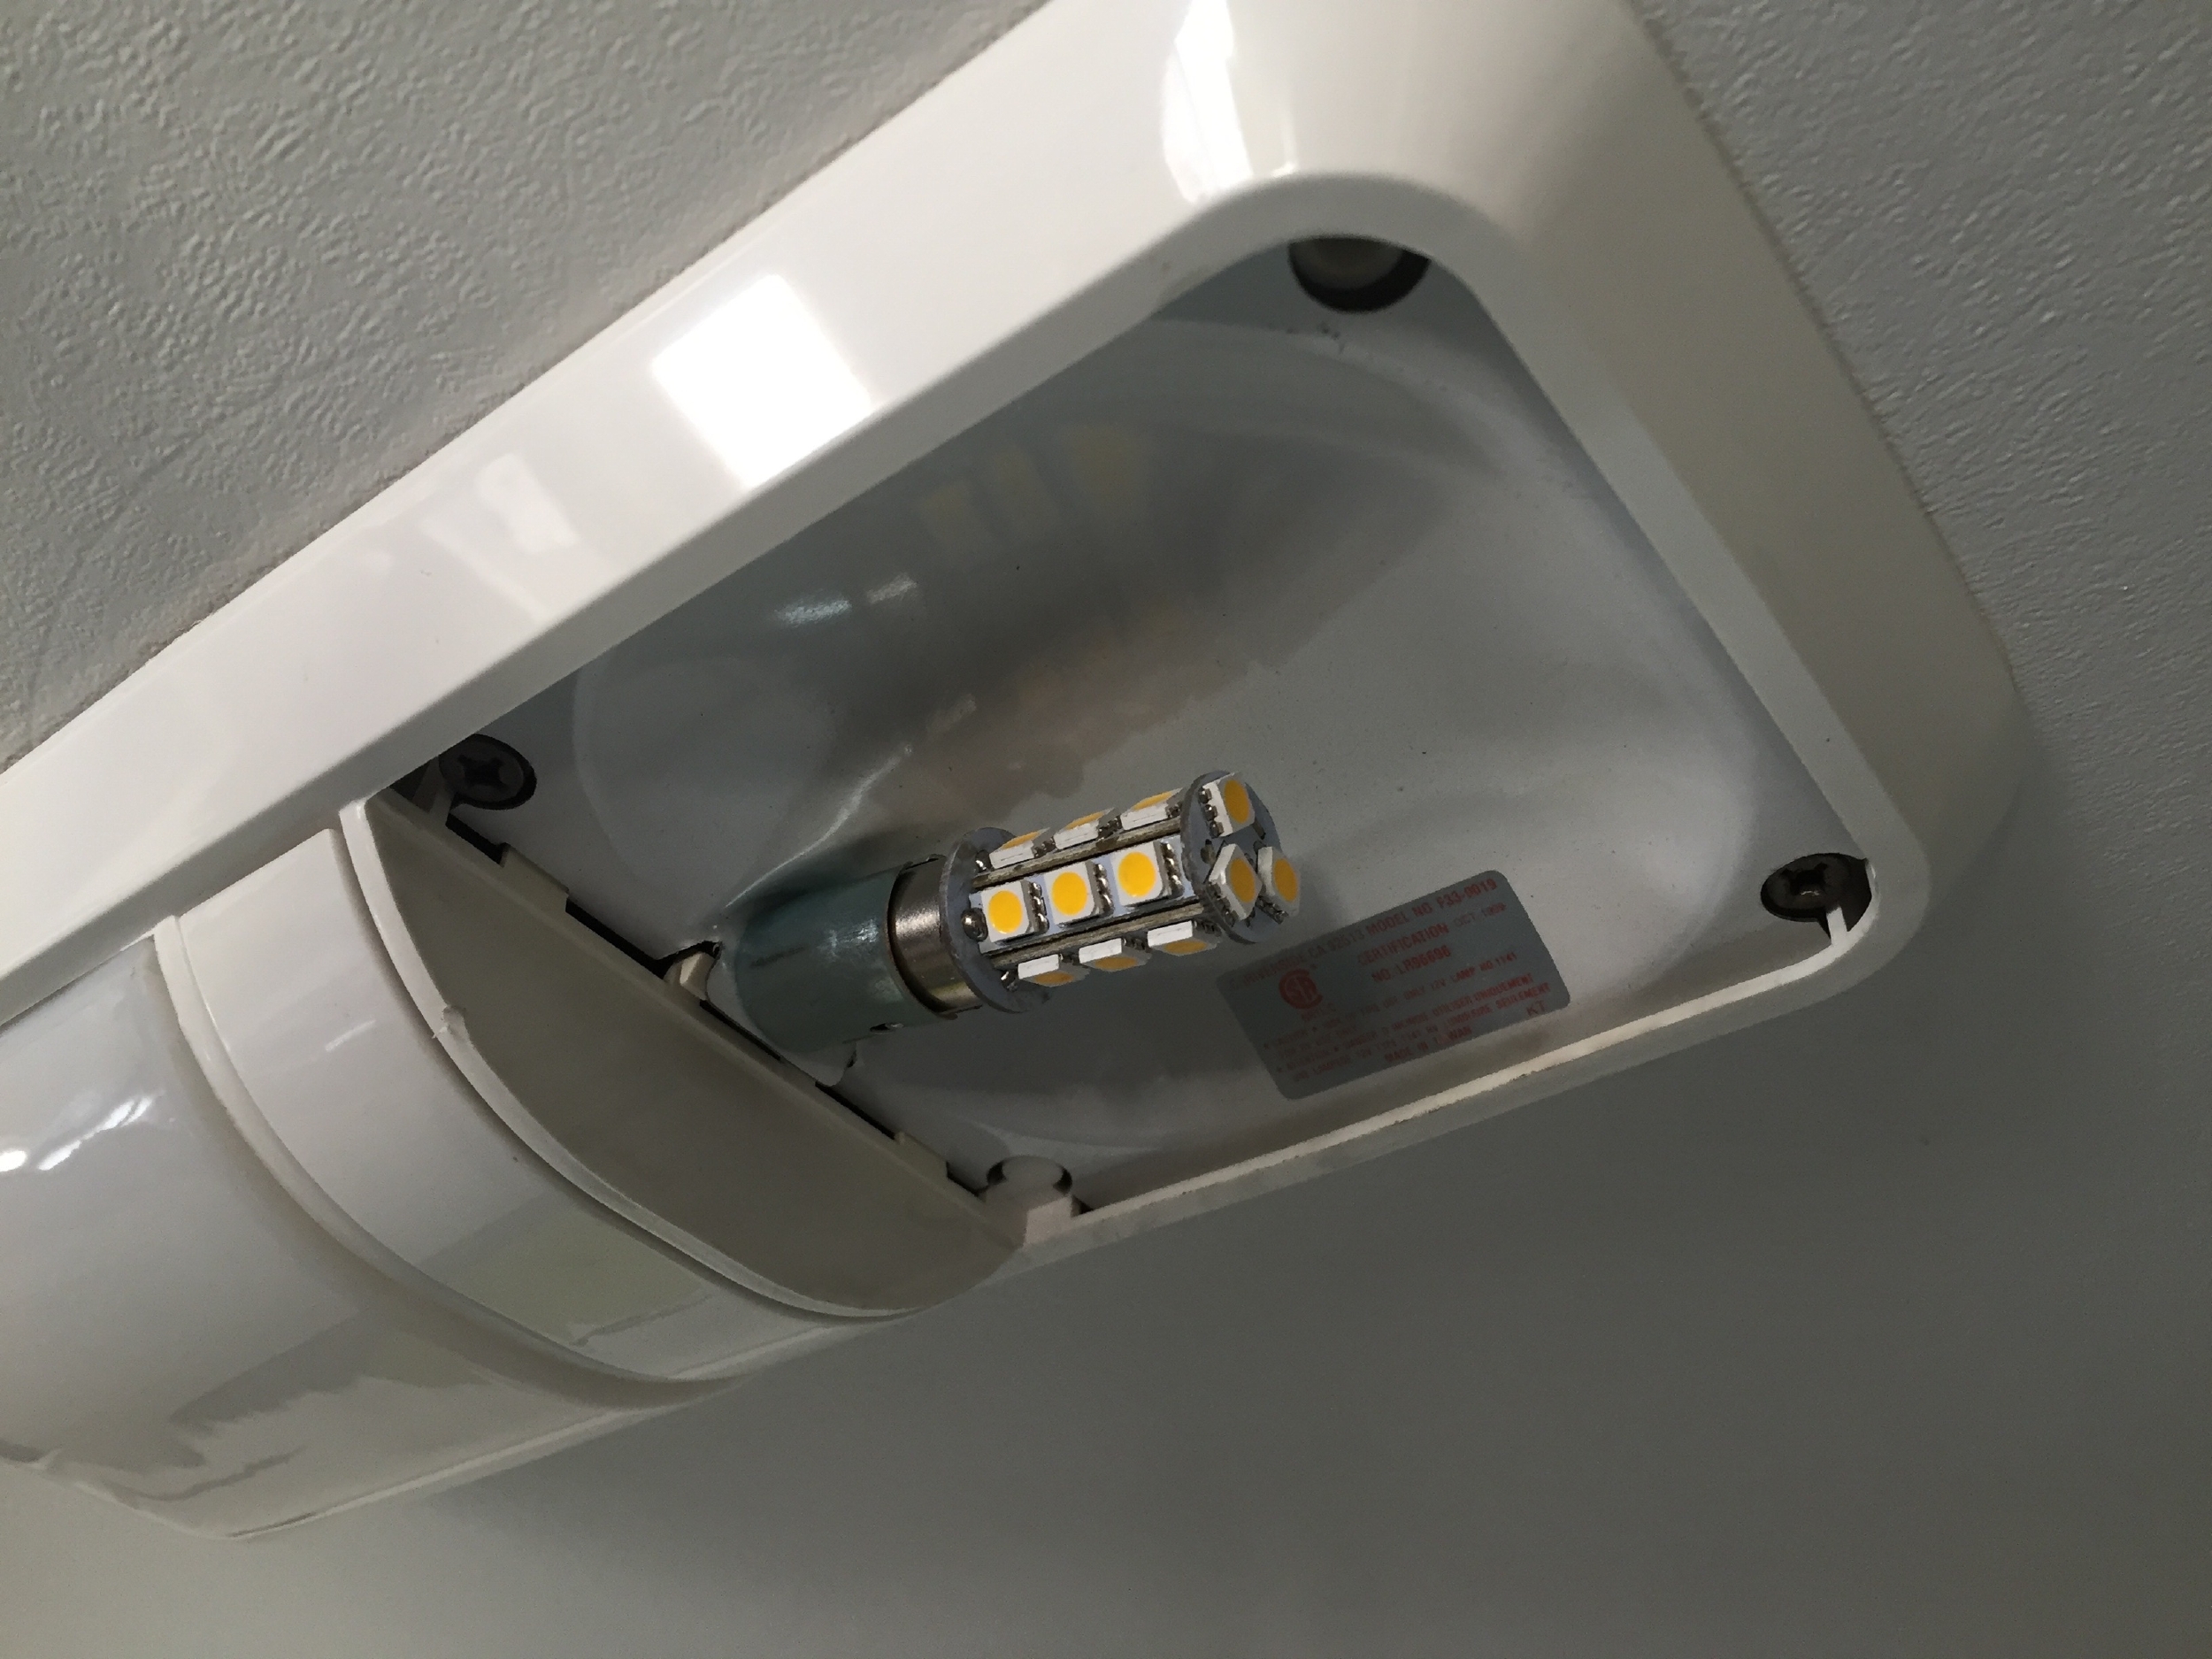
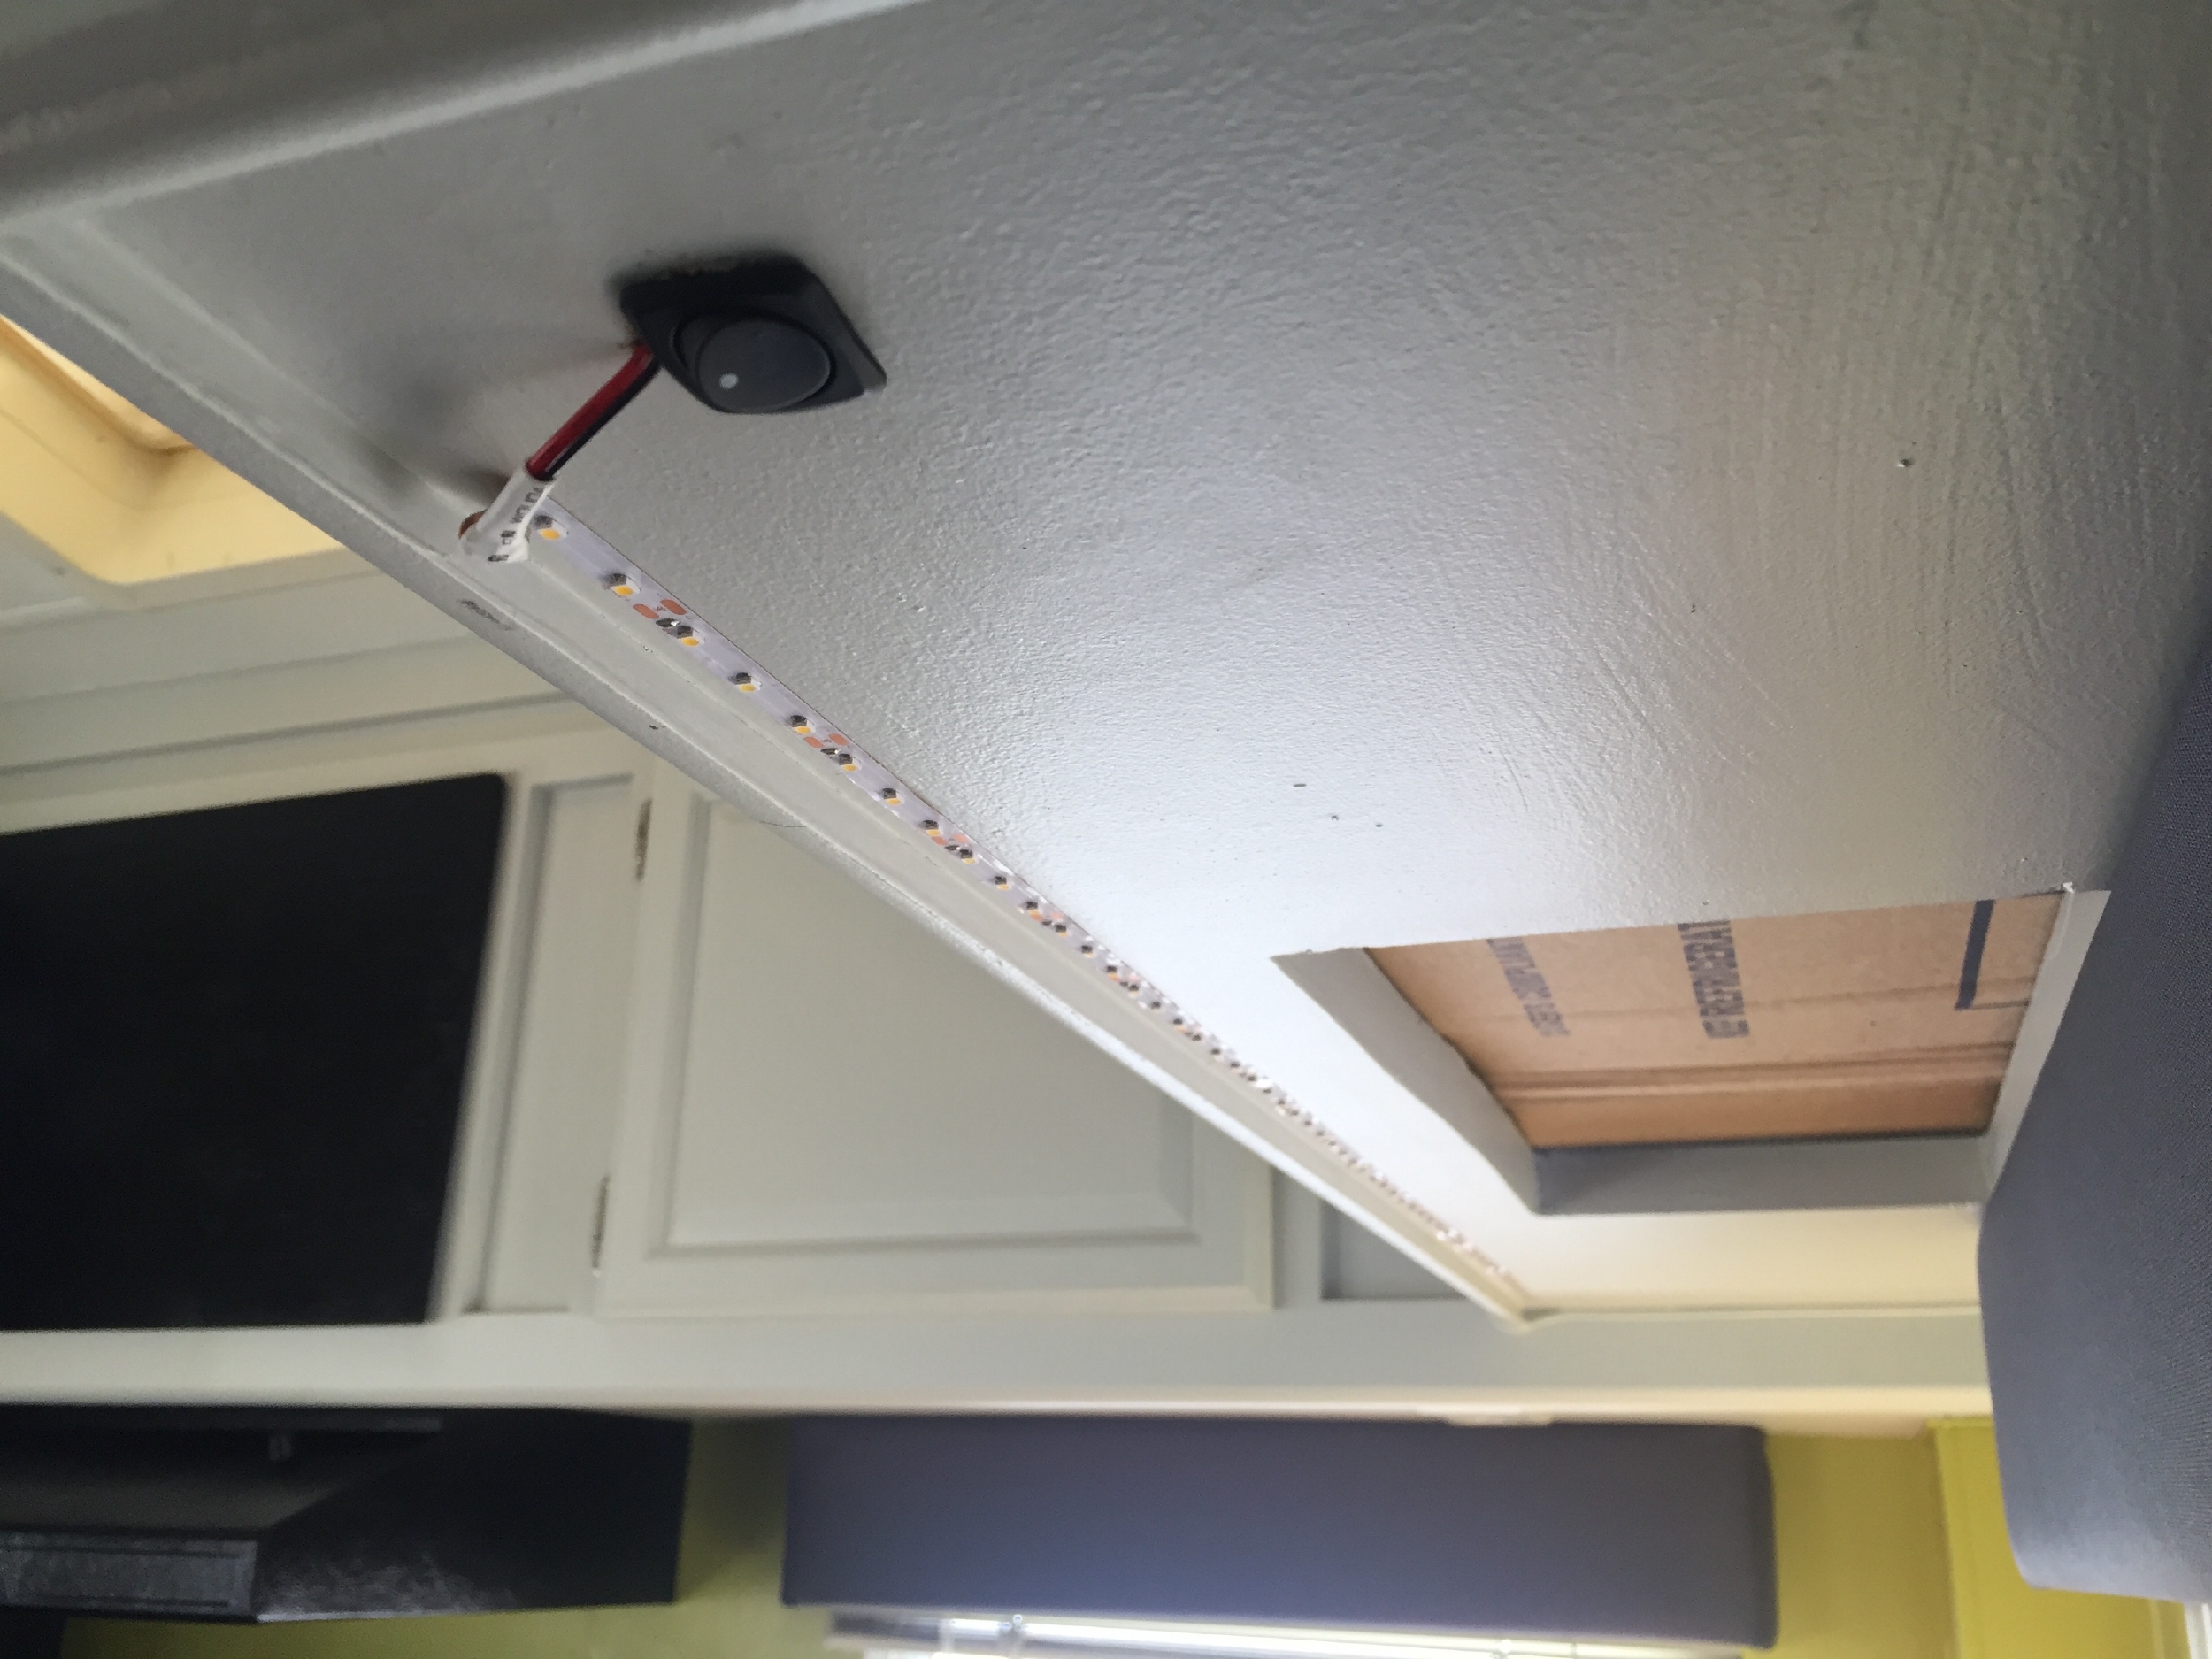
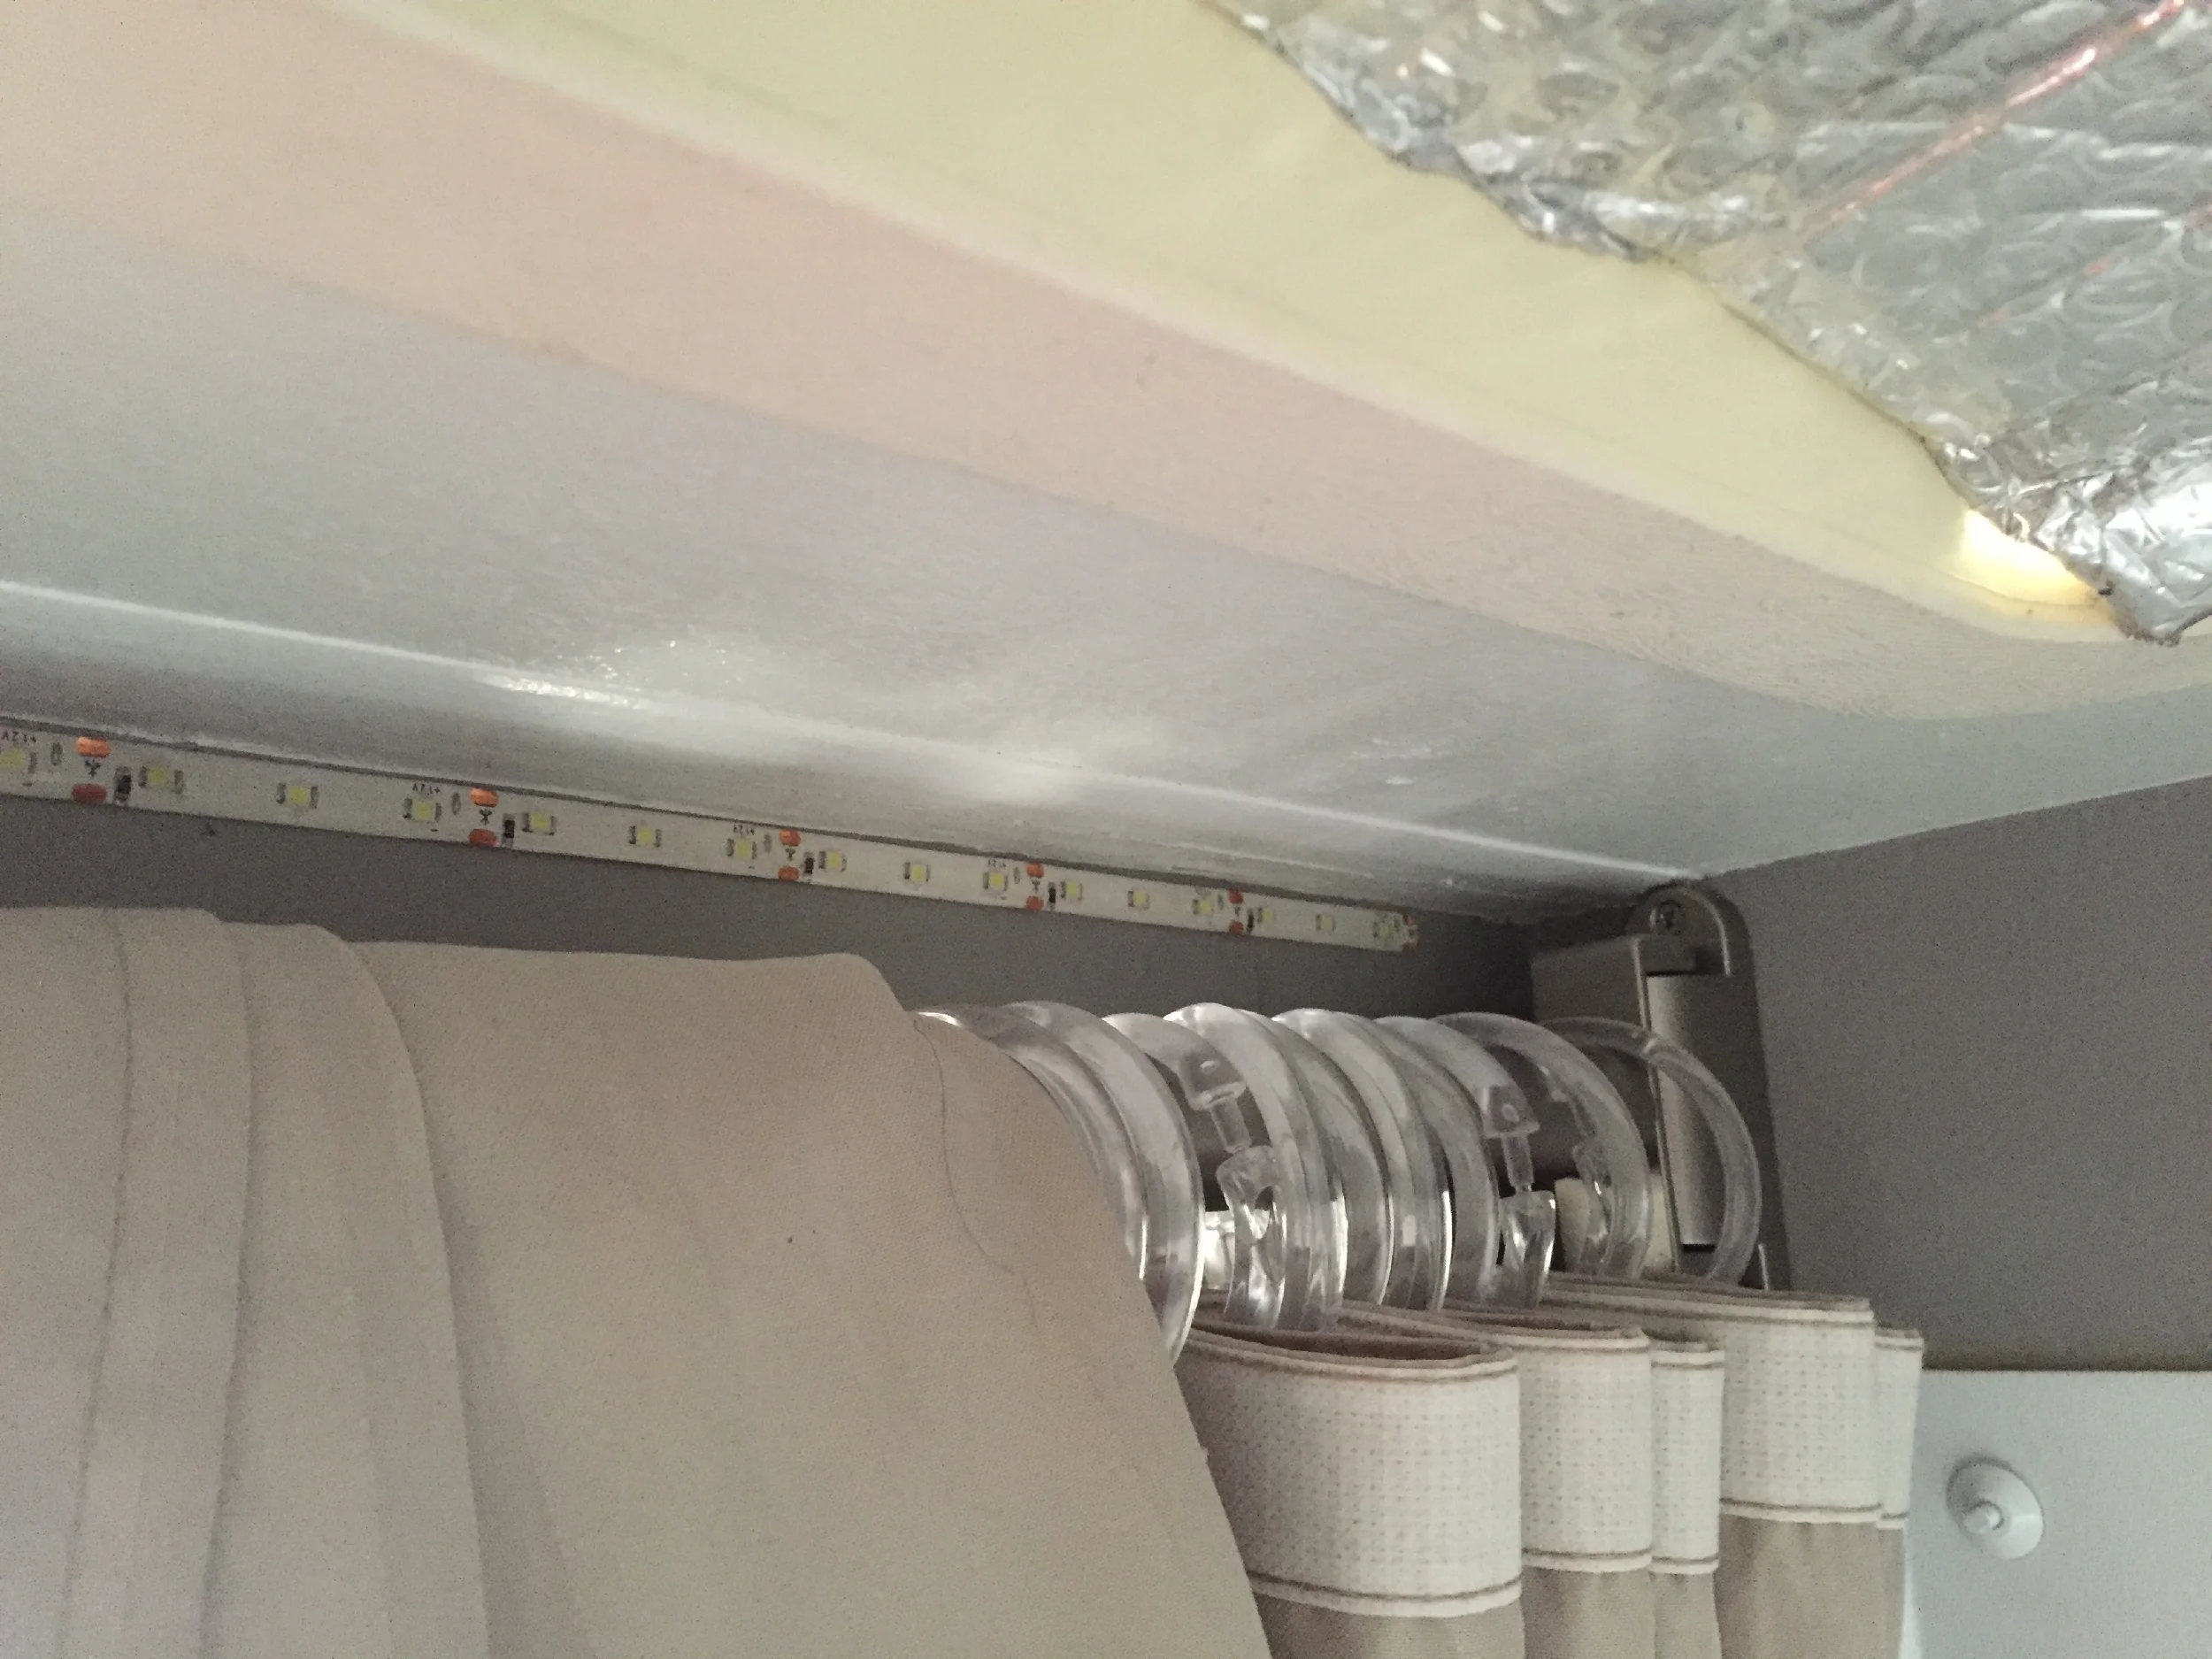
In the rebuild, we kept all the original light fixtures, but bought barrel-type LED bulbs to replace the old incandescent bulbs for lower power usage. We’re pretty happy with the result, but sometimes wish we had picked different color or brightness bulbs. We also used some brighter paddle-style LED bulbs for exterior and work spaces, and LED strip lights in the kitchen and shower.
Circuit 5: Fantastic Fans
These fans have great reviews on RV sites, and they do move air well, but we wish the thermostat and rain-sensor features worked differently. We recently posted our thoughts on them. We use them to keep the trailer ventilated and cool, and haven’t yet needed A/C in spite of some 90-degree weather this summer. Staying in arid climates helps here; if we were back in the humid Southeast, I think we’d have been missing that A/C.
Circuit 6: 12V receptacles
It's the details that make it feel like home
Many small devices run on DC power, but plug into an AC receptacle. This is done for the convenience of the average household user, but it's inefficient for us to run the inverter to create AC, only to convert it back to some tiny DC phone charger. So on either side of the bed, and near the dinette, we added marine receptacles for both USB and 12V “cigarette lighter” power points. The USB ports get used all the time for phone charging, and I’m very glad we added them. We haven’t actually used the cigarette lighter ports yet, but they give us the option of using 12V appliances in the future, which may be more efficient. There are heating blankets, fans, kitchen appliances, and even mobile refrigerators, which we could use here. Note that the USB receptacles have an internal voltage step-down to 5V – the USB standard. If you’re thinking of rigging up your own, make sure you step that 12V down to 5V or you’ll cook your electronics. Ask me how I know!
I have come to love Blue Sea Systems. They seem to be the only ones out there making the kinds of things we always needed for the RV (and the truck, actually). At the time of our rebuild, only the black, single 12V receptacles I linked above were available. But now I see that Blue Sea makes a duplex unit which I would have loved to use, plus the single receptacles are now available in white, which would look a lot nicer than the black ones we used.
Circuit 8: Exhaust fans
The stove and shower need exhaust fans to move smells and moisture out. No surprises there.
Circuit 9: Toilet fan
This could have gone with the other fans, but unlike the other fans, this one runs 24/7. There was a spare circuit, so why not make it separate? The toilet fan is powered through a relay, not because of high current or long wire runs, but because I wanted to be able to control it with the aux output of the solar charge controller (which is a very low-current signal). The Midnite Classic charge controller has two programmable aux outputs that can be used to run accessories by switching relays on or off. I thought I might want to turn the toilet fan off when the sun went down, or when battery voltage dropped too low. As it turns out though, the fan provided with our Air Head Composting Toilet is such a tiny load that running it 24/7 is no big deal. It’s nearly silent so we forget it’s running all the time.
Shake what you got
Our trailer has a finite capacity to generate and store energy, so we work within that, which means sometimes conditions dictate what we can or cannot do. This is going to be true of almost any off-grid situation (unless you can just throw a whole lot of money at it). If we’re expecting clear, mild weather, we don’t need to think about our usage much. If we’re expecting overcast, rain, or cold, we will conserve power so we can ride through coming days of little or no sun. We generally have about 4 days of autonomy, meaning we can make it that long without any solar charging. But that is 4 days of relatively Spartan living. In winter, the shorter daylight hours and lower sun mean we pay a lot more attention to what we use, and sometimes we put off vacuuming or making popcorn until a sunnier day.
One game we play is trying to not waste “free” incoming energy. If the batteries are at full charge, we can’t store any more energy as electricity even though the sun is still shining. But energy can be stored in other forms. Mostly, we use the surplus electrical supply to store thermal energy. This happens a lot in summer, and less often in winter months (due to shorter daylight). Here’s a few tricks we use:
- Cook meals ahead. Making two dinners or breakfasts in one day (or a double batch of one recipe) uses electricity not just for the cooking, but also doing the dishes (hot water) and refrigerating the leftovers. Reheating the meal the next day and cleaning just a couple dishes still uses power, but much less than the first time around. This is very effective.
- Make sure hot water tanks are up to temperature. We often turn ours off to conserve power, but once they are hot they will keep warm for about a day. If you've got the space, wrap them with heater tank insulation (from the hardware store), and improve not only their heating efficiency, but how long they keep hot once they're off.
- Make extra ice cubes in the freezer. This is great in hot weather because ice-cold beverages make it easier to get by without A/C. But even if the weather doesn’t warrant icy drinks, the extra ice inside the freezer improves the fridge’s efficiency.
- Freeze fruit or produce that is getting kind of old. This can be used for smoothies later, and it prevents food waste.
- Use an electric teakettle to fill a hot water bottle, and toss it under the bed covers. By the time you get into bed, it will be nice and toasty in there. The electric teakettle is our favorite appliance, since it is both faster and more efficient than boiling water on the electric stovetop. Hot water bottles may seem old-fashioned, but they work fantastically well!
- Pre-fill thermoses. This is only worth doing with actual vacuum flask thermoses, not cheapie plastic insulated bottles. Make your tea, coffee, or hot soup, and fill a large thermos with it. For even better results, pre-warm the thermos by filling with boiling water and let it stand for 10 minutes, then empty the water (save it for cooking or dishes!!!) and re-fill with your preferred liquid. Most good thermoses will keep contents uncomfortably hot for 24 hours. This is a nice way to have a hot beverage ready to go in the morning, or have hot soup for dinner without having to cook, or a nice warm lunch during a cold winter hike or snowshoe.
- The thermos trick is useful for keeping ice water (from your freezer), too. Our “Growler” sized vacuum flask has kept a lump of ice for 3 days, in the truck, in summer. Finishing a hot bike ride with cold water waiting in the truck is the greatest!
- Top up batteries on laptops, phones, rechargeable AA/AAAs, bike computers, GPS, etc.
Isn’t it hard?
Modern expectations are that we are entitled to use electricity however we want, whenever we want. This expectation – that people set the schedule and our built world must accommodate it, light or dark, hot or cold, wet or dry – drives waste and overconsumption. When we moved off-grid, we didn’t have to stop doing anything; we only became more flexible about when we did it. We have found this to be far less trouble than we feared, and these behaviors quickly became part of daily life. Seeing it all written out like this probably makes it seem like a pain in the ass, but that’s only because of how unfamiliar it is. In short order, it becomes something you just do, and having a little more connection to the natural world around us makes for a more fulfilling existence.
What have we missed? Please tell us in the comments if there’s other tips we should know about, or questions I (still) haven’t answered.