RV Rebuild Retrospectives: Kitchen
We’ve been living in the Toaster for over a year now. So we’ve had a lot of time to stare at the inside of the RV and wishfully talk about what we could have done differently and what we’re happy with. Rebuilding the Toaster was hard. Not having lived in it beforehand meant we didn’t know exactly what kind of features and changes we would want. We didn’t know how we would use the space. Like the saying goes, “Hindsight is always 20/20,” and I find that saying popping into my head a lot nowadays.
Another limiting factor for us during the rebuild was our axle weight limit. If we had known we were going to have to change our axles in a little over a year then we would have gotten new axles during the rebuild so that we had more weight capacity to make build the Toaster the way we wanted.
The cost of the rebuild was also a limiting factor. We initially thought we were just going to put in a new roof, solar power, floors, and paint so we weren’t ready for the extra cost to rebuild the entire RV. On top of that the storage unit where we worked on the Toaster was expensive and we had to be in there several months longer than we planned. So we didn’t want to spend a lot of time on extensive customizations. Another reason we didn’t want to put a lot of money into the Toaster was the risk of trying something so different. We didn’t know how long we were actually going to live on the road, whether living in a 100% solar powered RV was actually doable, and how much of a resale value the Toaster would have if it didn’t work out.
So with all those reasons inhibiting us from building the Toaster the way we really wanted, I want to talk about the things we wish we’d done differently and what we’re happy with. For the sake of length, each post will focus on one living area.
RV Rebuild Retrospective Series:
Kitchen

PROS:
While we wish we had taken the RV stove/oven out right from the start, we didn’t because we weren’t sure if we had enough solar capacity to run an electric cooktop and oven. But back in June, Jerud removed our RV stove/oven and replaced it with an induction cooktop and toaster oven and we love it! Aside from the change making us legitimately propane free, we enjoy the open space when we’re not cooking, it’s a lot cleaner looking, cooking is a lot easier now, and the upgrade meant we now have a backsplash that I sorely missed having.
Some may argue that having a double basin sink is over the top for living in such a small space, but I wouldn’t have it any other way. The second basin is used to dry our dishes and frees up a good amount of counter space. We have 2 wooden covers for the basins if we need additional counter space, but we rarely use them.

Part of the reason we rarely use the sink covers is because we have a flip up counter at the end of our kitchen counter. We’re so happy that we had the foresight to add it. Without it our kitchen would feel a lot smaller. Having just that much more counter space makes a big difference and prevents me from having a total freak out on bad cooking days.
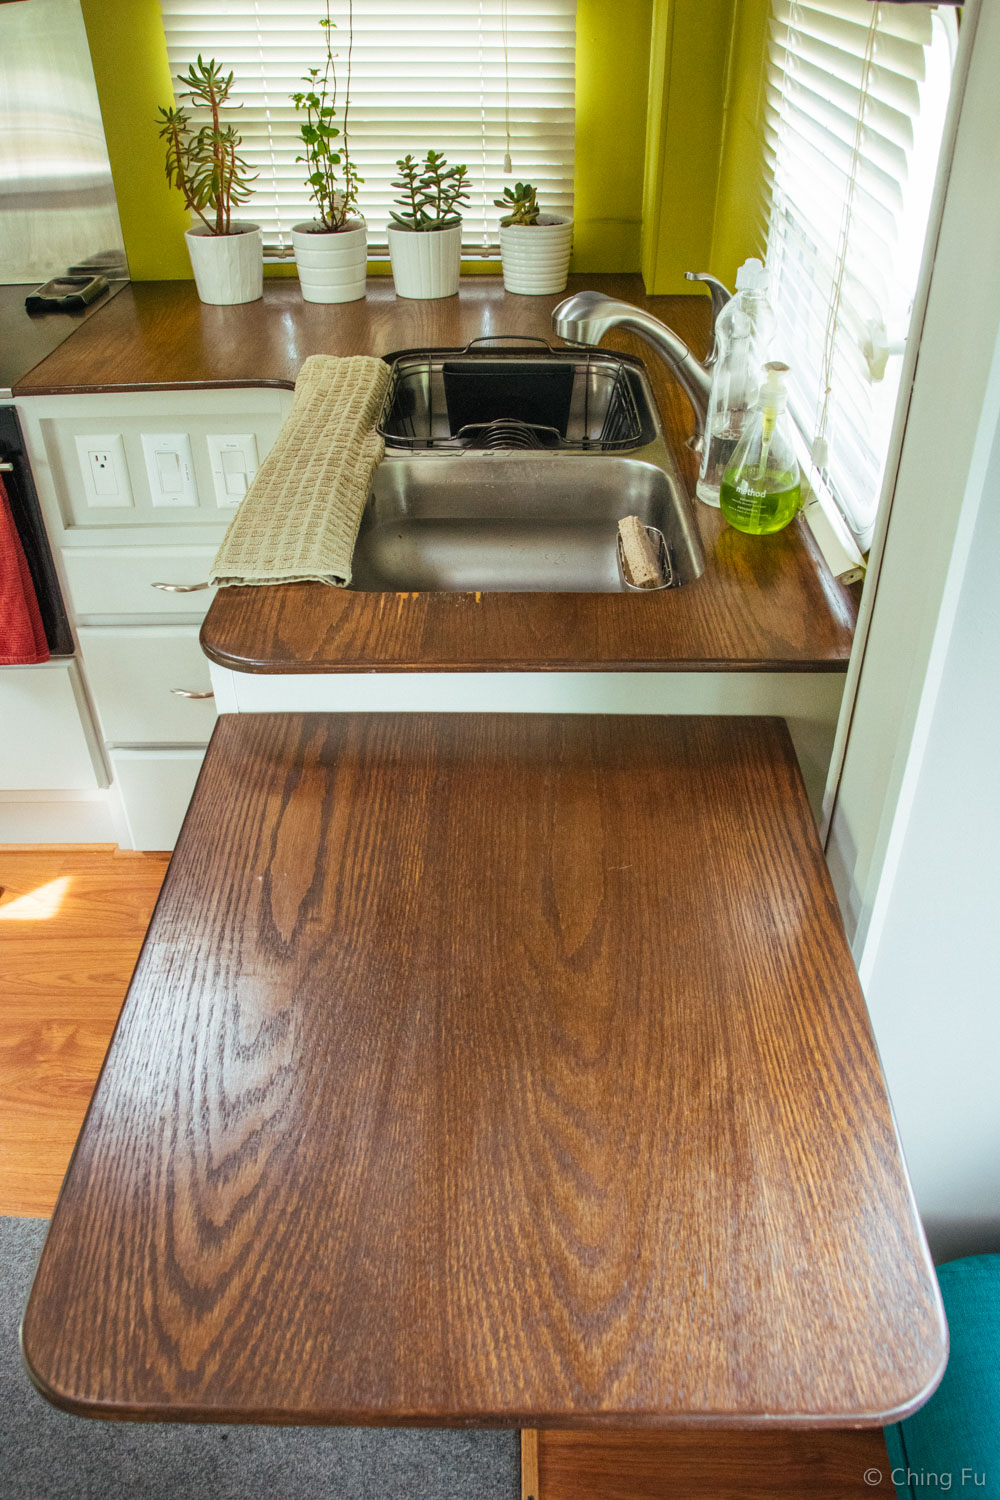
I highly encourage anyone redoing their RV or looking to upgrade their RV to put in a foot pedal to control the kitchen faucet. Being able to just step on a pedal to control water coming out of the kitchen faucet is a game changer. Not only does it make washing dishes so much easier, but it also helps us conserve so much more water than manually turning off the faucet. After a little practice, we can even adjust the flow of the water using the foot pedal.

We kept the original kitchen sink but made it an undermount sink instead of an overmount. It’s a lot nicer looking and it’s easier to keep clean.
If you are considering replacing your RV fridge then read Jerud’s post about residential fridges in RVs and see if it makes sense with your RV set up. If yes, get a residential fridge! Ours is just an apartment size fridge and that’s a perfect size (I wouldn’t want something bigger). A residential fridge also makes sense if you mainly boondock in the middle of nowhere and town runs are usually a long drive. If you typically stay in cities then it doesn’t really matter if you’re not able to keep a week to two week’s worth of food in the fridge. For us, it matters – a lot.
We didn’t change out our kitchen drawer tracks until just over a month ago. And I have to say I wish we did it way sooner. The design of the original tracks caused the drawers to not close properly, sit crooked, and unlock itself when the Toaster bounced during drives. We didn’t realize how crappy the tracks were until after we moved into the Toaster and then we were too stubborn to change them out. We changed them to standard residential types and added latches inside the drawers to hold them shut while we drive. Now they stay shut and operate more smoothly.
CONS:
We really, really messed up with our countertops and it’s something we regret every single day. Partially because of money and partially because of our weight limit, we used cheap plywood as our countertop instead of spending more money and getting something substantial. On top of that, I didn’t spar varnish the wood enough to make it fully waterproof. So now (this started about 3 months after moving into the Toaster) our countertop around the sinks (mainly kitchen and a tiny bit in the bathroom) is peeling because water keeps seeping into the wood and separating the top layer. Instead of spar varnishing our counter tops, we wish we had used self-leveling epoxy. (We've redone our kitchen countertops since this post.) Also, the plywood is pretty soft, and dents easily (like when canned goods come flying out of the cabinets on bumpy roads). Tip: Get good, hardy material for your kitchen counter and waterproof the crap out of it.

Our messed up countertop.
Jerud really wishes the bottom of the cabinets were indented inwards so there’s space for his toes to go when he’s standing in front of it to wash dishes. Instead, he feels like he’s leaning into the cabinet.

I had redone all the valances inside the Toaster using really thick fabric. But one thing I didn’t think about is how far cooking oil pops when cooking. The valance next to the stove has oil stains on it from cooking and the one above the kitchen sink has some kind of similar stains (from dirty dish water splashing on it?). If I had known this would happen, I would have used Scotchguard to protect the two valances. But instead, despite all the different cleaning solutions I’ve used, I’m stuck with the stains. (I am totally open to tips on how to get the stains out!!)

The distance between the cooking area and the valance.
Jerud had this great idea to cut a hole in the cabinet above the sink so we could put the drying rack there and water could drip directly into the sink. We were both really excited about it but unfortunately it didn’t turn out as we hoped. It wasn’t until we used the drying rack in the cabinet that we realized it didn’t totally line up to the sink like we thought. Instead the water would drip onto the countertop behind the sink. After living in the Toaster for several months we realized that the drying rack was taking up precious cabinet space that we really needed. So we’ve filled the hole in the cabinet, placed the drying rack in the second kitchen sink basin, and now use the cabinet for storing food.
Overall we’re happy with the kitchen. It’s a good size and with a bit of organization, child safety locks on the cabinets, and the changes we’ve made since we’ve been on the road, the day-to-day use is fine. I just have to remind myself that we could have done a lot worse.